Pectoralis Major Repair Info Evidence
Last reviewed

Rehabilitation protocol after pectoralis major repair, with the protected safe zone and staged return to chest loading.
This protocol guides your recovery after pectoralis major repair with Dr Kieran Hirpara at Mater Private Hospital Rockhampton. Each phase below opens with a plain-English explanation of what is happening and what matters most, followed by the structured detail your physiotherapist needs — bring this page or its PDF to your first physiotherapy visit so your rehabilitation stays coordinated. Your physiotherapist may adjust the plan depending on how your recovery progresses.
If you have any concerns about your wound after surgery, get in touch with the rooms. It is often helpful to take a photo of the wound and email it for review. The incision sits close to the armpit crease, where sweat and moisture build up — keep it clean and dry, and report any redness, discharge or fever promptly.
What to expect
The pectoralis major is the powerful chest muscle that drives pressing and hugging movements — the bench press, push-ups, and bringing the arm across the body. A tear usually happens in a fit young man during the lowering phase of a heavy bench press, when the muscle is stretched and loaded at the same time. Repairing it re-attaches the torn tendon, and the whole programme is built around one simple idea: keep the repaired tendon off-stretch and off-load while it heals.
The pectoralis major pulls the arm across the body and inward, and rotates it inward. The two movements that stretch and tension the repair most are taking the arm out to the side (abduction) and rotating it outward (external rotation) — especially both together, which is the position that tears it in the first place. So early on, the arm is kept in front of the body, rotated gently inward, and those two movements are strictly limited and let back in a few degrees at a time.
Because the repaired tendon is what tears the muscle off the bone if it is overloaded, heavy chest work — the bench press, flyes, dips, push-ups and contact sport — is deliberately delayed to four to six months. This is longer than it feels like it should take, but it is the single most important thing protecting your repair.
Your timeline also depends on how the tendon was repaired. A bone-tendon repair (the tendon re-attached to the upper arm bone with anchors or buttons) heals more slowly than a tendon-to-tendon repair, and comes out of the sling a little later. Dr Hirpara will tell you which applies to you. Throughout this programme, you move forward when your shoulder is ready, not just when the calendar says so — each phase below lists what "ready" looks like.
The procedure
A pectoralis major repair re-attaches the torn chest-muscle tendon. Most often the tendon has pulled off where it inserts onto the upper arm bone (the humerus), and it is re-attached there with strong sutures through anchors or buttons; sometimes the tear is within the tendon itself and is stitched back together. The job of rehabilitation is to protect that re-attachment while it heals, then gradually rebuild full movement, strength and confident pressing power.
Wearing your sling
You will wear a simple sling — Dr Hirpara uses a simple sling, not a bulky abduction-pillow or gunslinger brace. The sling holds your arm in the protected position: in front of your body and rotated gently inward, where the repaired chest muscle is relaxed.
- Wear the sling for 4 to 6 weeks (a bone-tendon repair stays in it longer than a tendon-to-tendon repair — Dr Hirpara will tell you which). You don't need to sleep in it.
- Take it off only for showers and for your exercises, once you have been shown how — and whenever the sling is off, keep your arm in front of your body and by your side, not out to the side and not rotated outward.
- Resting at home, it can come off if you are sensible about it: arm supported on a pillow, kept in front of you.
- Use ice if the shoulder is swollen or sore, especially after exercise.
While you are in the sling, watch your posture. Keep your ears, shoulders and hips in line and avoid letting your shoulders slump — good posture protects your back and helps prevent your shoulder stiffening.
Key precautions — do NOT
- Do NOT rotate the arm outward past the weekly limit your physiotherapist sets. Outward rotation starts at the straight-ahead (neutral, 0°) position and is let back in by only about 5° each week — because rotating outward stretches the repair.
- Do NOT take the arm out to the side beyond the small amount allowed each week, and never combine taking the arm out to the side with rotating it outward — that is the position that tears the muscle.
- Do NOT let the elbow travel backward behind the line of your chest (this stretches the repair) — and avoid this for a long time afterwards in the gym.
- Do NOT do pendulum (arm-dangling) or stick-levered exercises in the first weeks — unusually for shoulder surgery, letting the arm dangle or levering it with a stick pulls on the repaired chest muscle. (Stick-assisted drills come in later, from about week 4.)
- Do NOT push, press or load the chest — no bench press, flyes, dips, pec-deck, push-ups or contact sport — until cleared, not before 4 to 6 months.
- Do NOT force or stretch any movement, and do not work the repaired chest muscle directly (resisted inward rotation or pressing) until your team starts it, from about week 9.
Phase I — Protection (weeks 0–3)
The first weeks are entirely about protecting the repaired tendon while it knits onto the bone. You stay in the simple sling day and night, with the arm in front of you and rotated gently inward. Your hand, wrist, fingers and elbow keep moving normally. From about week 2, your physiotherapist may begin to gently move the shoulder for you (passive movement) within strict limits — but nothing under your own power, nothing forced, and no pendulum or stick exercises.
- Sling: simple sling, arm in front and rotated gently inward, worn day and night.
- Movement allowed: passive (assisted) movement only, started from about week 2 and kept within tight limits — outward rotation only to neutral (0°), forward lift only to about 45°, and arm-out-to-the-side only to about 30°. Your elbow, wrist and hand move freely.
- Exercises: hand, wrist and elbow movement; gentle hand squeeze; shoulder-blade setting and low rows for the muscles around the shoulder blade (kept low, well below shoulder height). No chest-muscle loading at all.
Ready for the next phase when: your pain is controlled; your wound has healed with no signs of a problem; your passive movement is comfortable within the limits above; and there is no sign the repair has been over-stressed.
Phase II — Restoring movement and weaning the sling (weeks 4–6)
Kieran Hirpara 4.0
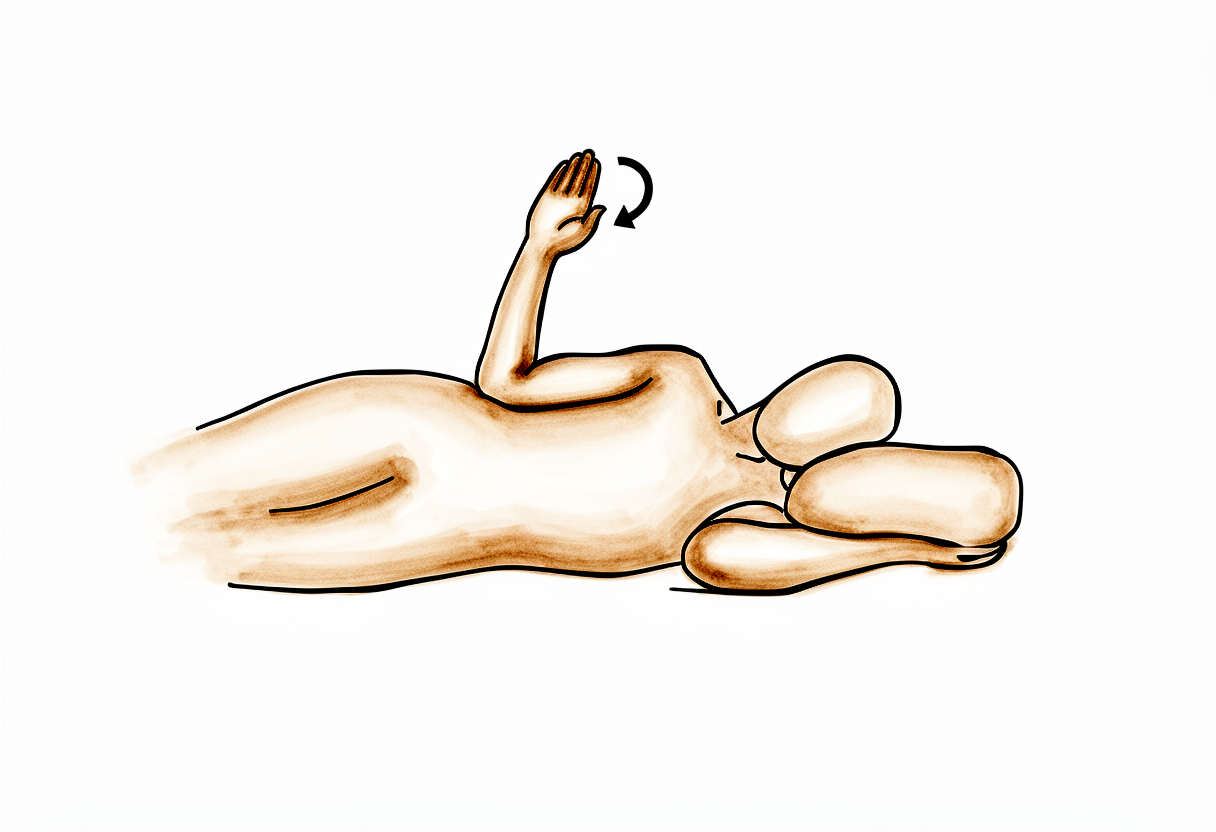
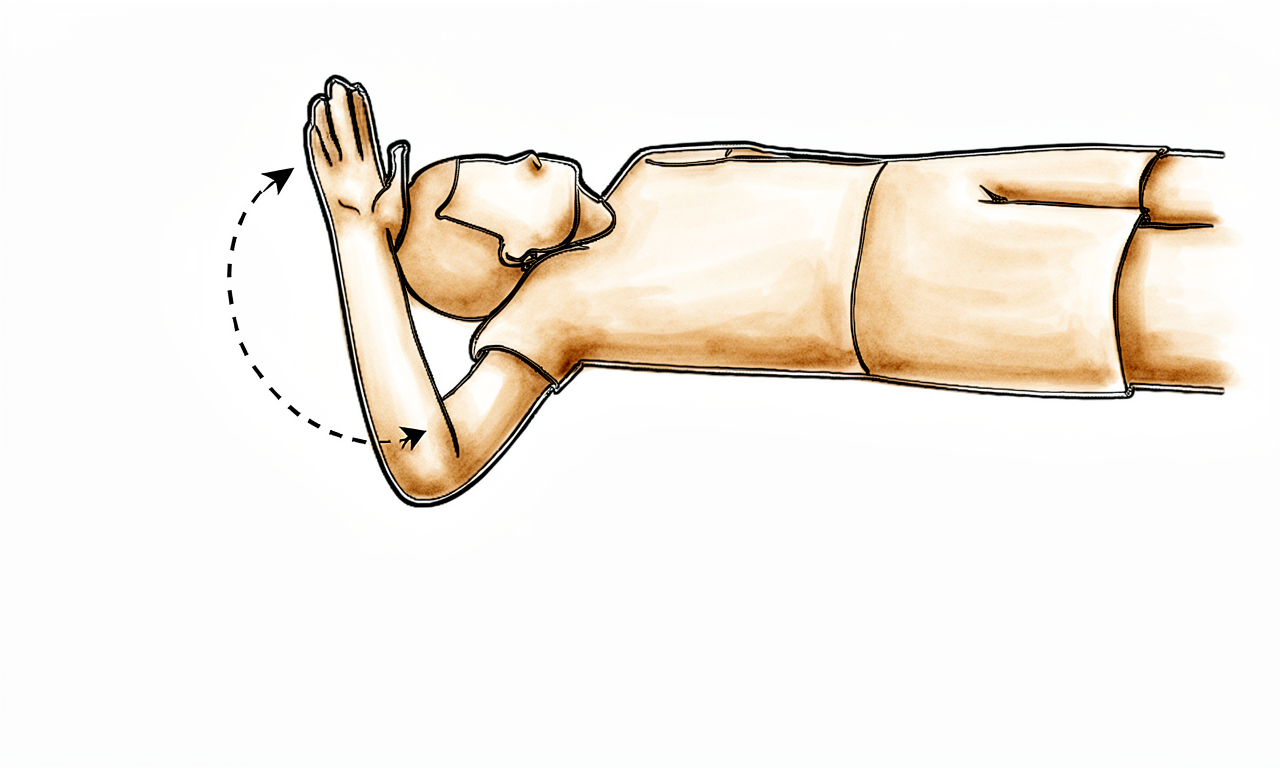
Assisted forward lift in lying
Lie on your back. Use your good hand under the elbow of the operated arm to help lift it forward, only to the height your physiotherapist has set, then lower slowly. The operated shoulder stays relaxed and your good arm does the work. Introduced from about week 4 — not in the first weeks.
As guided by your physiotherapist
Kieran Hirpara 4.0
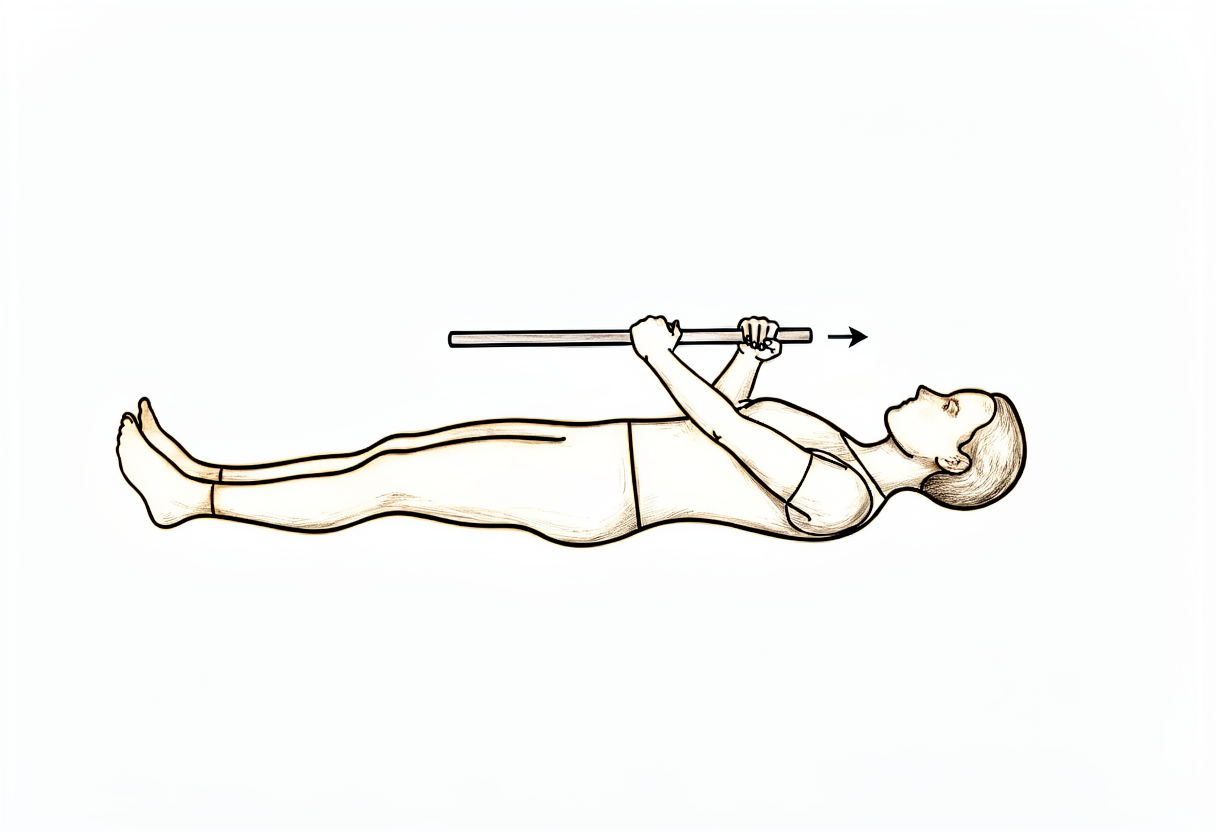
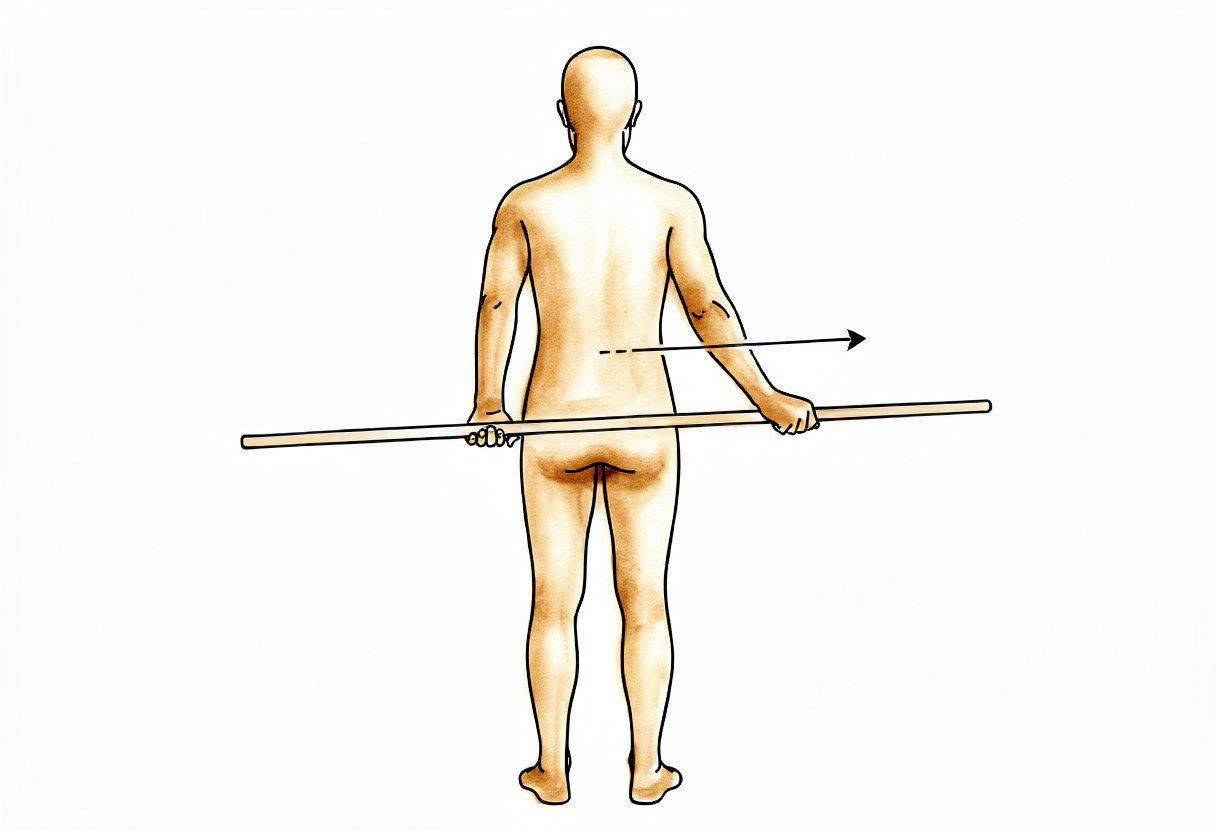
Assisted outward rotation with a stick
Hold a stick (or walking stick) in both hands with the elbow of the operated arm tucked at your side. Use your good arm to push the operated forearm gently outward, only to the weekly limit your physiotherapist has set, then return. Introduced from about week 4 — not in the first weeks.
As guided by your physiotherapist
Kieran Hirpara 4.0
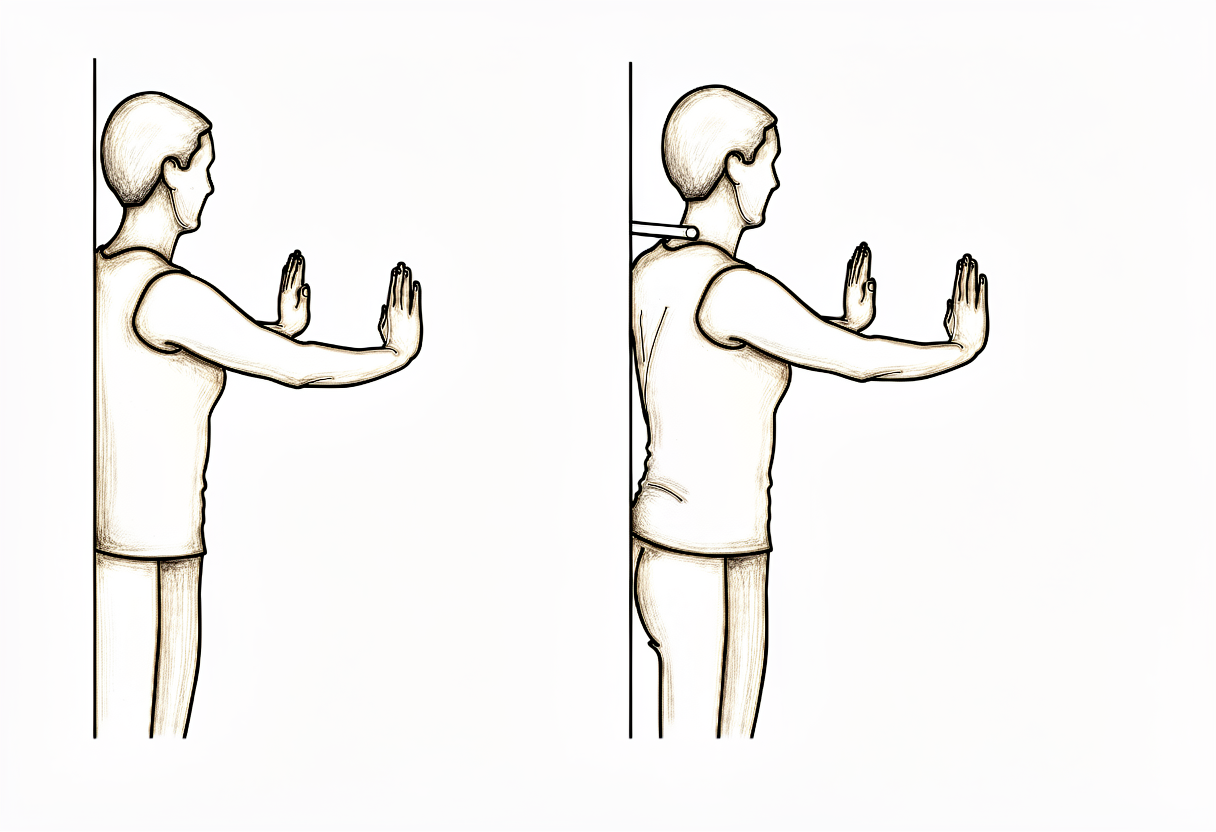
Press-and-hold outward rotation
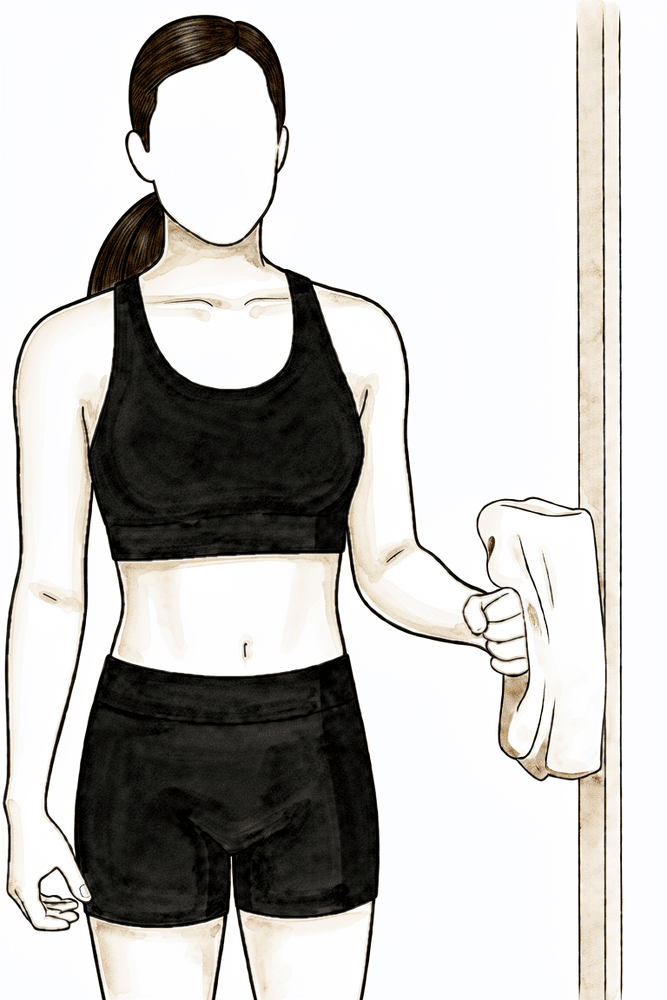
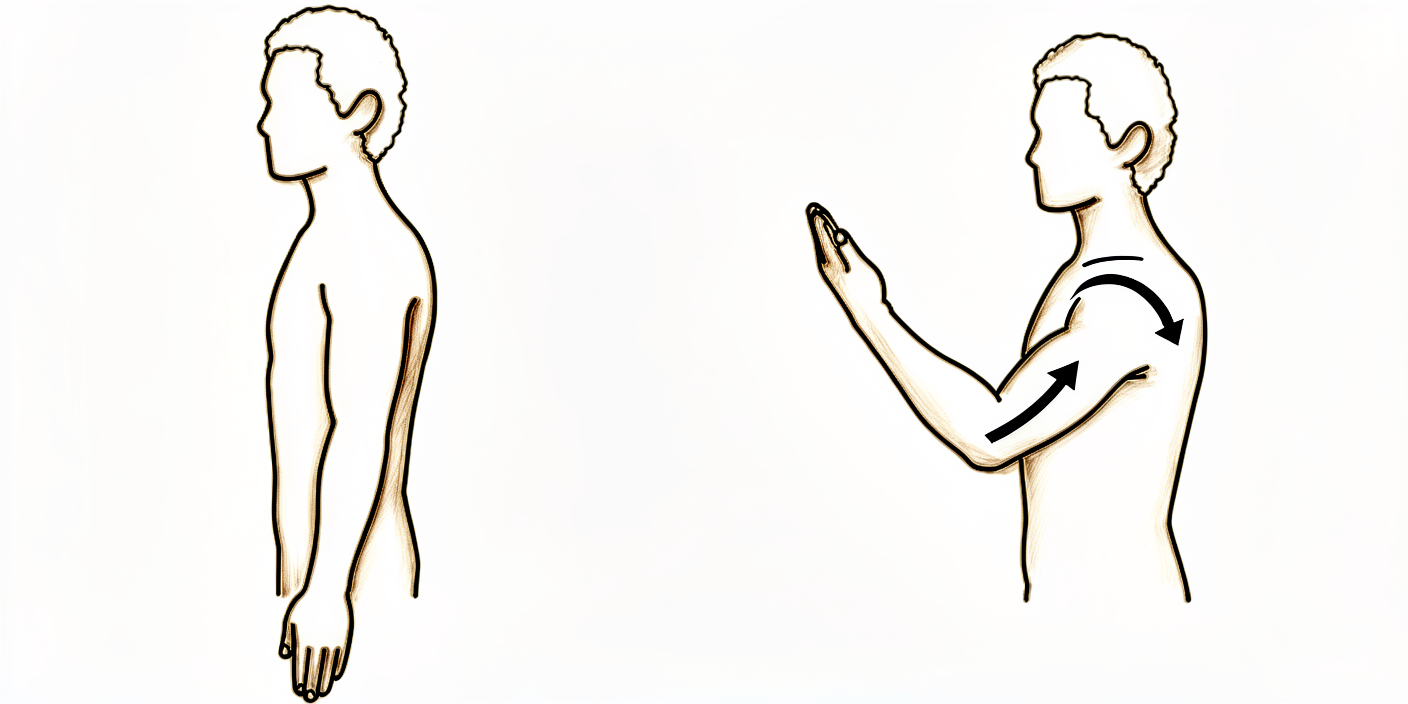
Stand with your elbow tucked at your side and bent to 90 degrees, the back of your hand against a wall or door frame. Press the back of your hand gently outward into the wall — about a quarter of your effort — without the arm actually moving. Hold for about 5 seconds, then relax.
10 times, once or twice a day
Kieran Hirpara 4.0
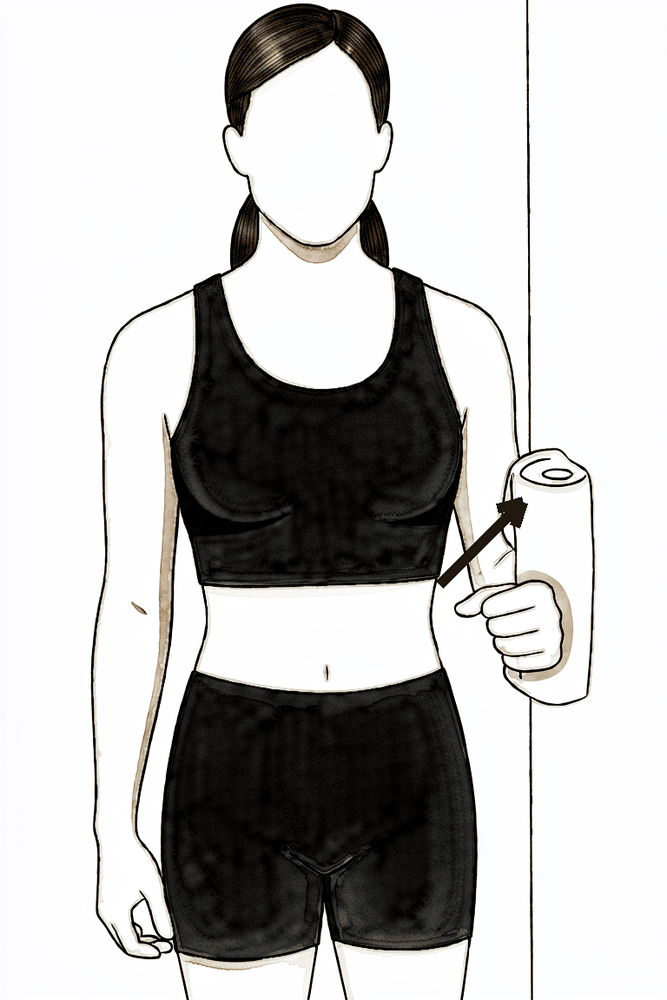
Press-and-hold arm-out-to-the-side
Stand side-on with the outside of your upper arm against a wall, elbow at your side. Press gently outward into the wall — about a quarter of your effort — without the arm moving. Hold for about 5 seconds, then relax.
10 times, once or twice a day
Kieran Hirpara 4.0
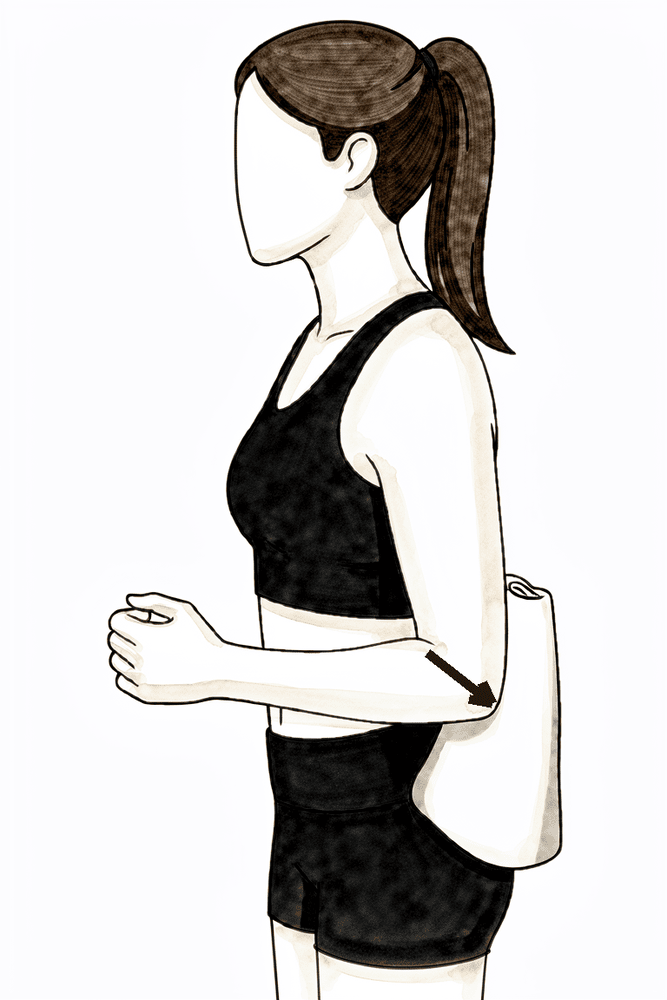
Press-and-hold arm-backward
Stand with your back near a wall, arm at your side and elbow straight. Press the back of your arm gently backward into the wall — about a quarter of your effort — without the arm moving. Hold for about 5 seconds, then relax. This works the muscles behind the shoulder. We use this instead of an inward-pressing hold early, because inward pressing loads the repaired chest muscle.
10 times, once or twice a day
The repair is healing and the sling is gradually weaned off — earlier for a bone-tendon repair (around week 4), a little later for a tendon-to-tendon repair (weeks 5–6). Your protected movement advances by only a few degrees each week, and gentle assisted (stick-assisted) drills can now begin. Light muscle-tensing (isometric) drills start for the muscles around the shoulder — but not for the chest muscle itself, and not for inward rotation, because both load the repair.
- Sling: being weaned off — around week 4 for a bone-tendon repair, weeks 5–6 for a tendon-to-tendon repair.
- Movement allowed: passive and assisted movement, advancing by about 5° each week — outward rotation building up from neutral, forward lift towards about 65–85°, and arm-out-to-the-side towards about 50°. Still no movement under your own power, and no pushing past the weekly limits.
- Exercises: assisted forward lift in lying; assisted outward rotation with a stick (only to the weekly limit); press-and-hold (isometric) drills for outward rotation, arm-out-to-the-side and arm-backward — not inward rotation; shoulder-blade setting.
Ready for the next phase when: you are out of the sling; your protected movement is advancing on schedule; you have no pain at the front of the shoulder when rotating outward to the limit; and your isometric drills are comfortable.
Phase III — Active movement (weeks 6–8)
Kieran Hirpara 4.0
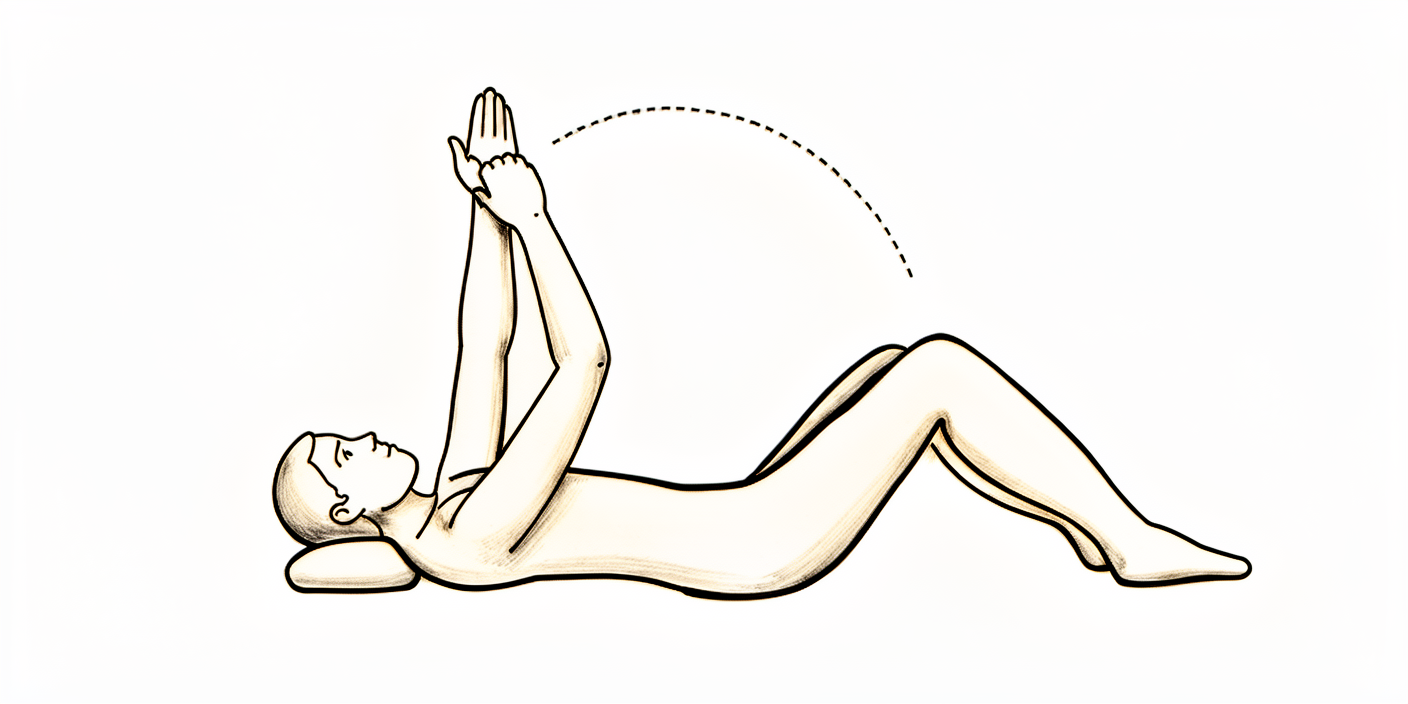
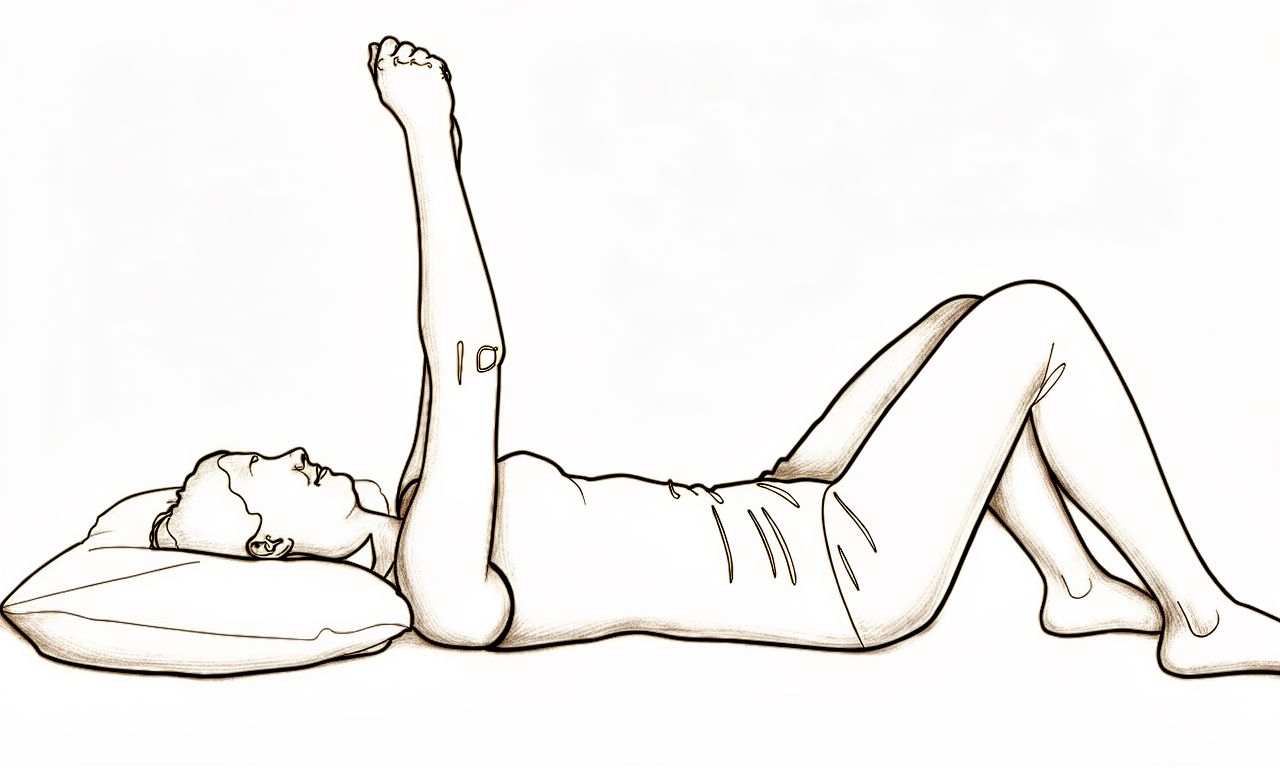
Supine punch (salute)
Lie on your back with the operated arm pointing at the ceiling. Reach the hand up towards the ceiling so the shoulder blade lifts off the floor, then lower slowly. Keep the movement smooth and within a comfortable range.
10 times, once a day
Kieran Hirpara 4.0
Outward rotation lying on your side
Lie on your good side with the operated elbow tucked into your waist and bent to 90 degrees. Keeping the elbow tucked, rotate the forearm upward as far as is comfortable, then lower slowly. Start with no weight.
10–15 times, once a day
Kieran Hirpara 4.0
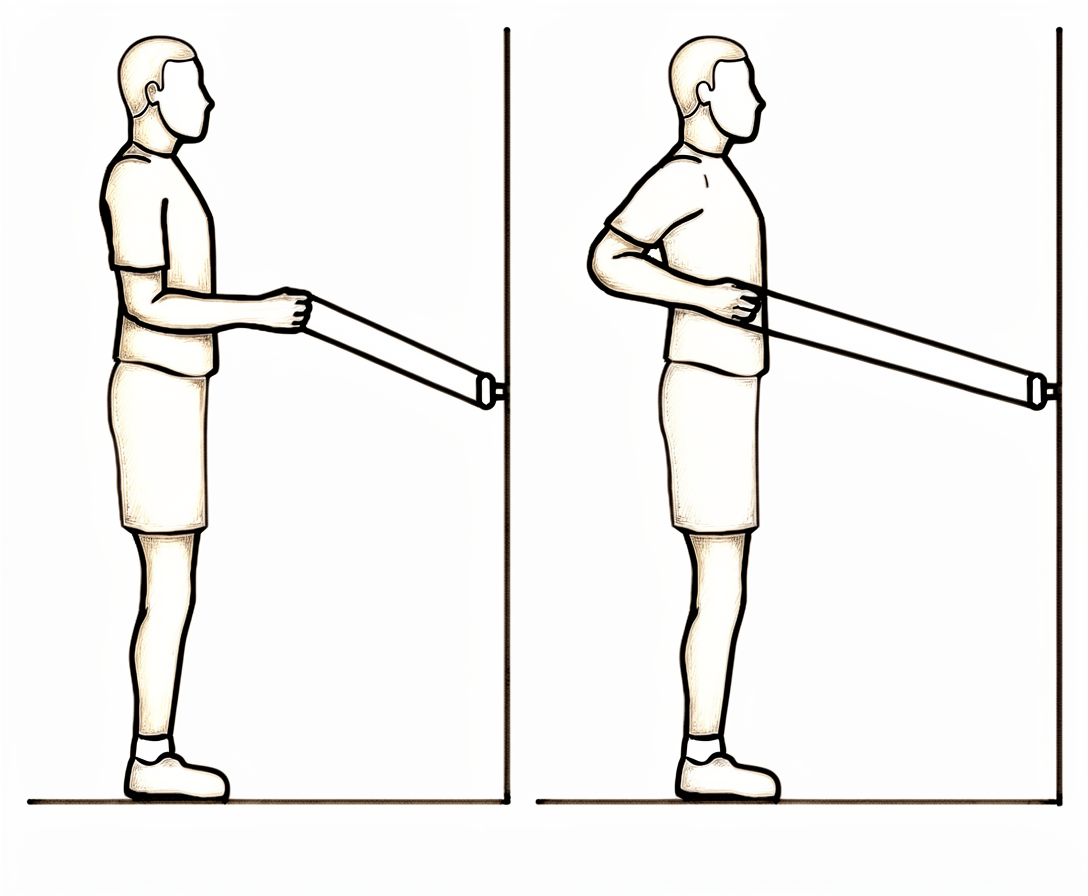
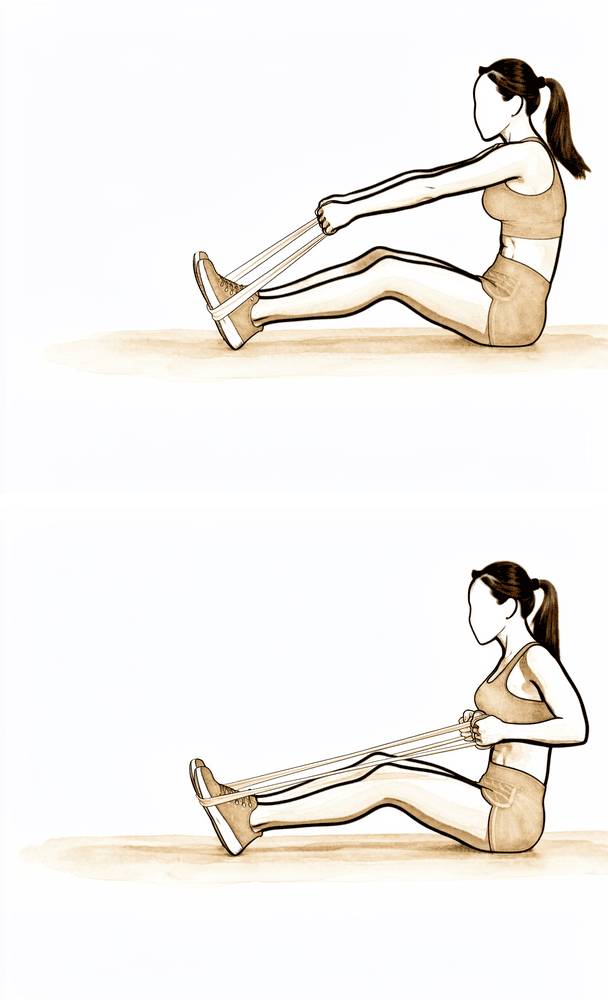
Resistance-band rows
Anchor a band in front of you at waist height. Stand tall and draw your elbows back towards your body, squeezing the shoulder blades, then return slowly. Keep your elbows close to your sides and do not let them travel behind the line of your body.
10–15 times, once a day
Kieran Hirpara 4.0
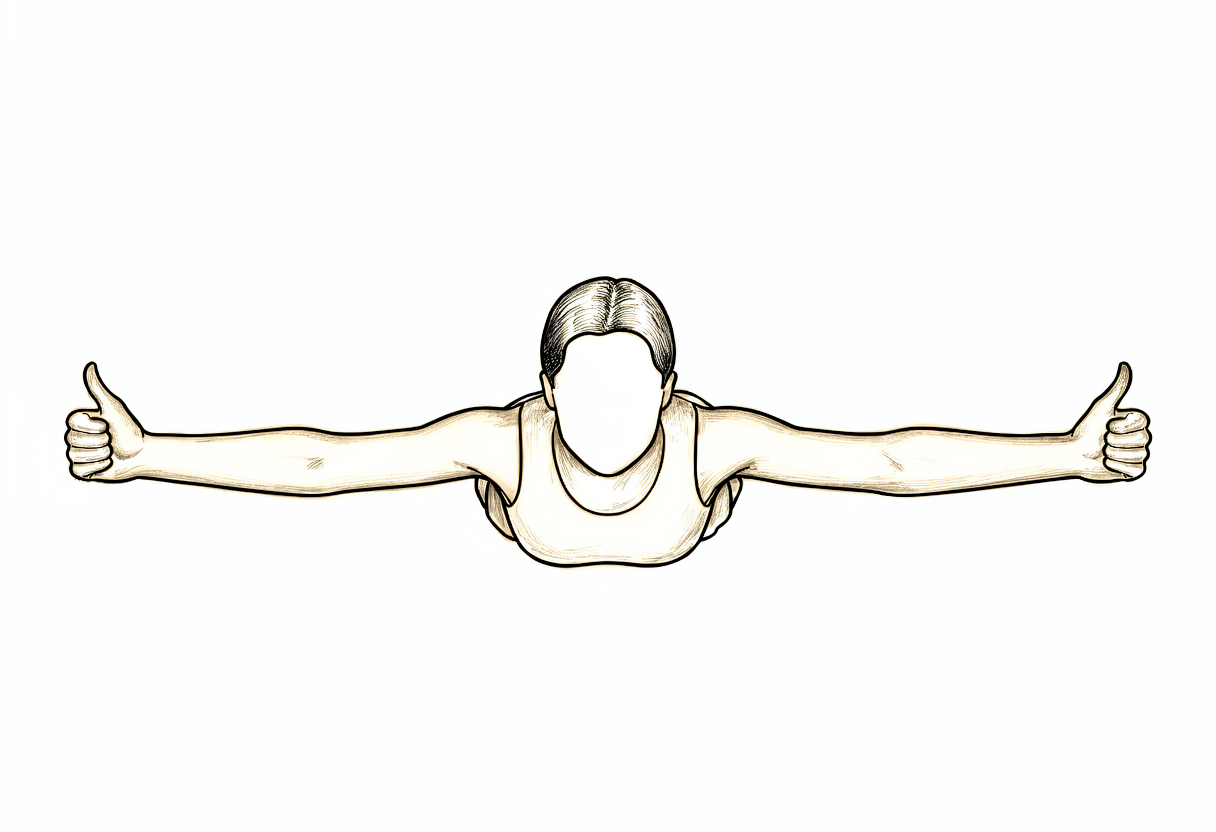
Shoulder-blade pull-down (prone Y)
Lie face down with your arms hanging down. Raise them out to the sides to shoulder level, squeezing the shoulder blades together, then lower slowly. Keep the movement small and controlled.
10 times, once a day
Kieran Hirpara 4.0
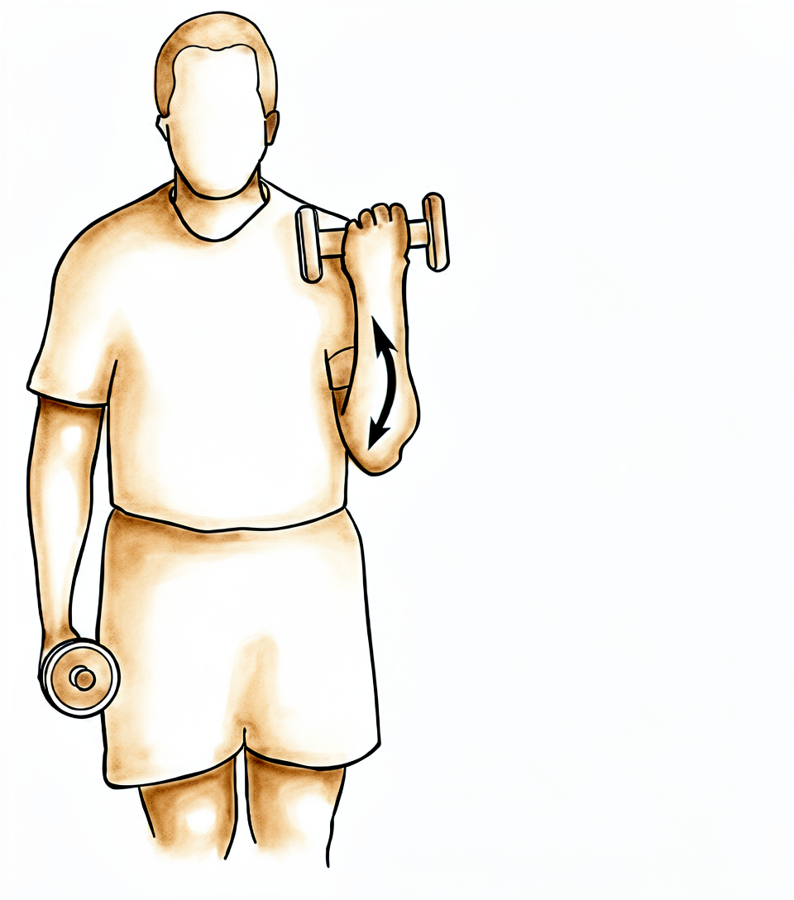
Biceps curl
With a light weight and your elbow tucked at your side, bend the elbow to lift the weight, then lower slowly. Keep the upper arm still and in front of your body.
10–15 times, once a day
Kieran Hirpara 4.0
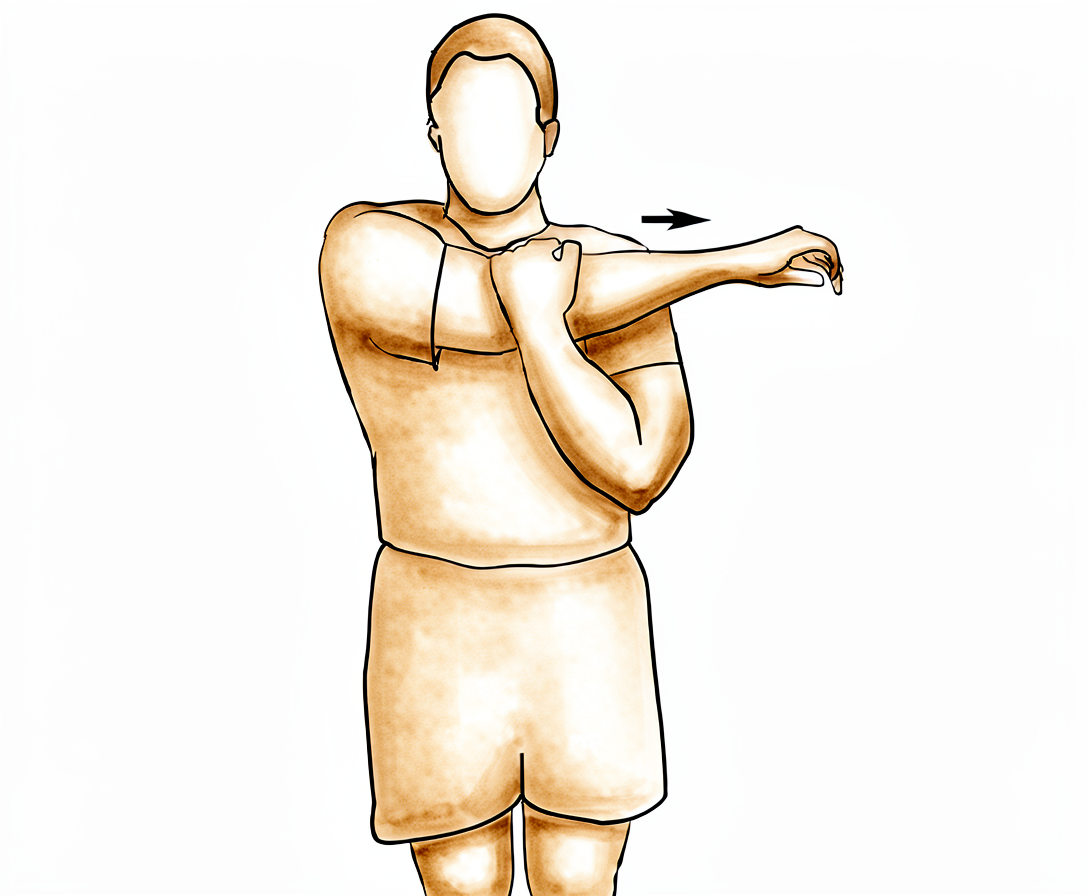
Cross-body stretch
Use your good hand to gently draw the operated arm across your chest, below shoulder height, until a gentle stretch is felt at the back of the shoulder, then release. Do not force or stretch into pain.
Hold 20–30 seconds, 2–3 times
Kieran Hirpara 4.0
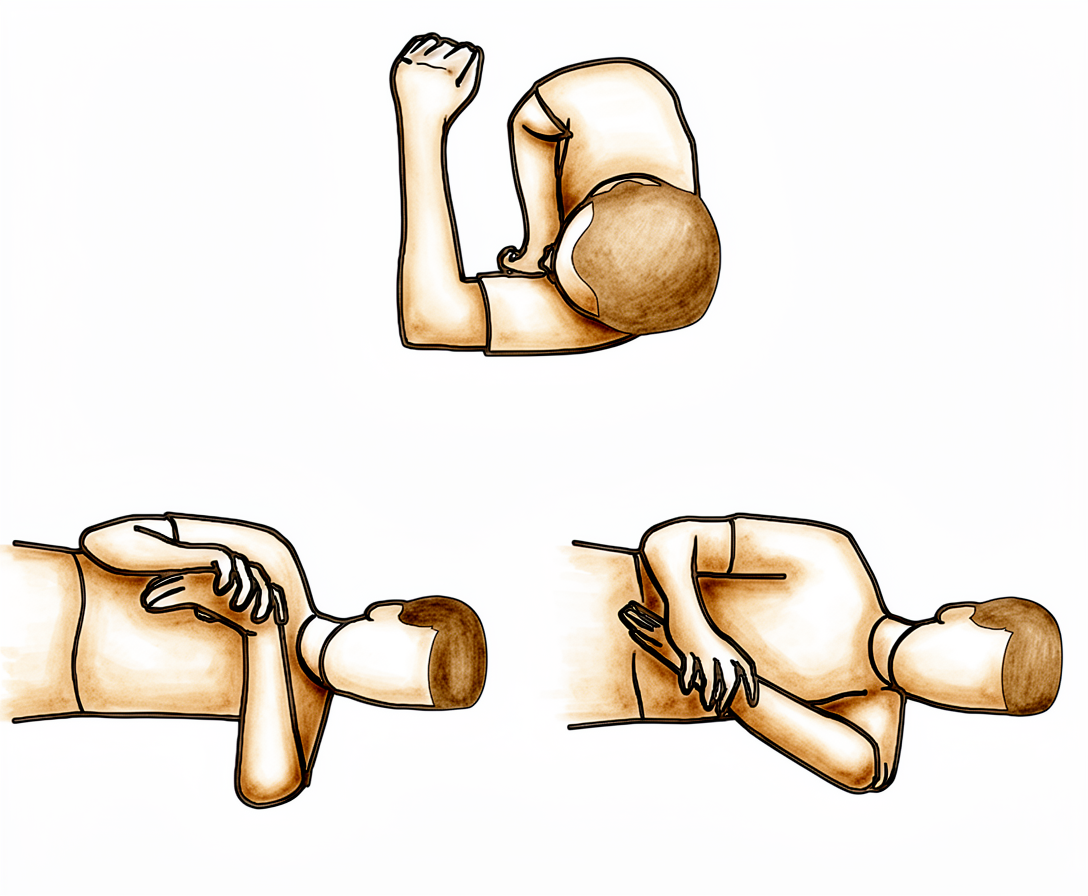
Sleeper stretch
Lie on your operated side with the shoulder and elbow bent to 90 degrees. Use your good hand to gently press the forearm down towards the bed until a gentle stretch is felt at the back of the shoulder. Do not force it.
Hold 20–30 seconds, 2–3 times
From about six weeks the sling is gone and you start moving the arm under your own power, beginning in easy positions where gravity helps least — lying down, or reaching towards the ceiling. Your protected ranges keep opening up by a few degrees a week towards full. The muscles around the shoulder are strengthened, and gentle stretches for the back of the shoulder begin — but the repaired chest muscle is still left alone.
- Sling: discontinued.
- Movement allowed: passive movement continuing towards full (about 5° more each week in each direction), and active movement under your own power beginning. Light weight-bearing through the arm is allowed.
- Exercises: supine punch (salute); outward rotation lying on your side (no weight); resistance-band rows and shoulder-blade work; light biceps; cross-body and sleeper stretches for the back of the shoulder.
Ready for the next phase when: your movement is full or nearly full in all directions; you can move the arm under your own power with good control (no shrugging or hitching); and there is no front-of-shoulder pain.
Phase IV — Loading the chest muscle begins (weeks 9–14)

Kieran Hirpara 4.0
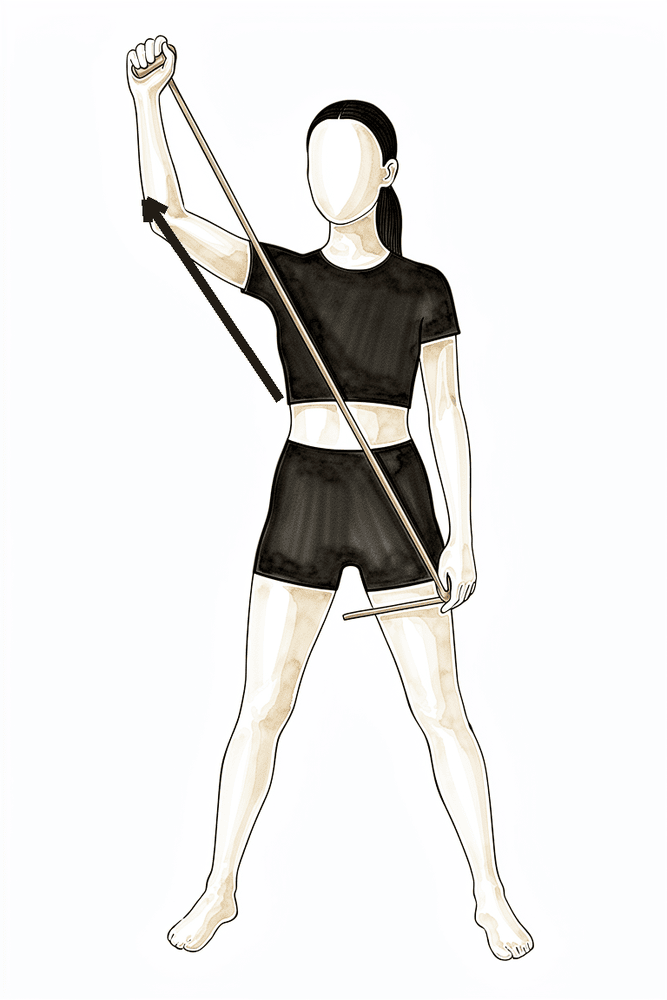
PNF diagonal D1 with a band
Holding a band, move the arm in a controlled diagonal — from across your tummy out and up towards the opposite side — then reverse smoothly. Your physiotherapist will set the start and end positions. Begin only once you have full, pain-free movement.
As guided by your physiotherapist
Kieran Hirpara 4.0
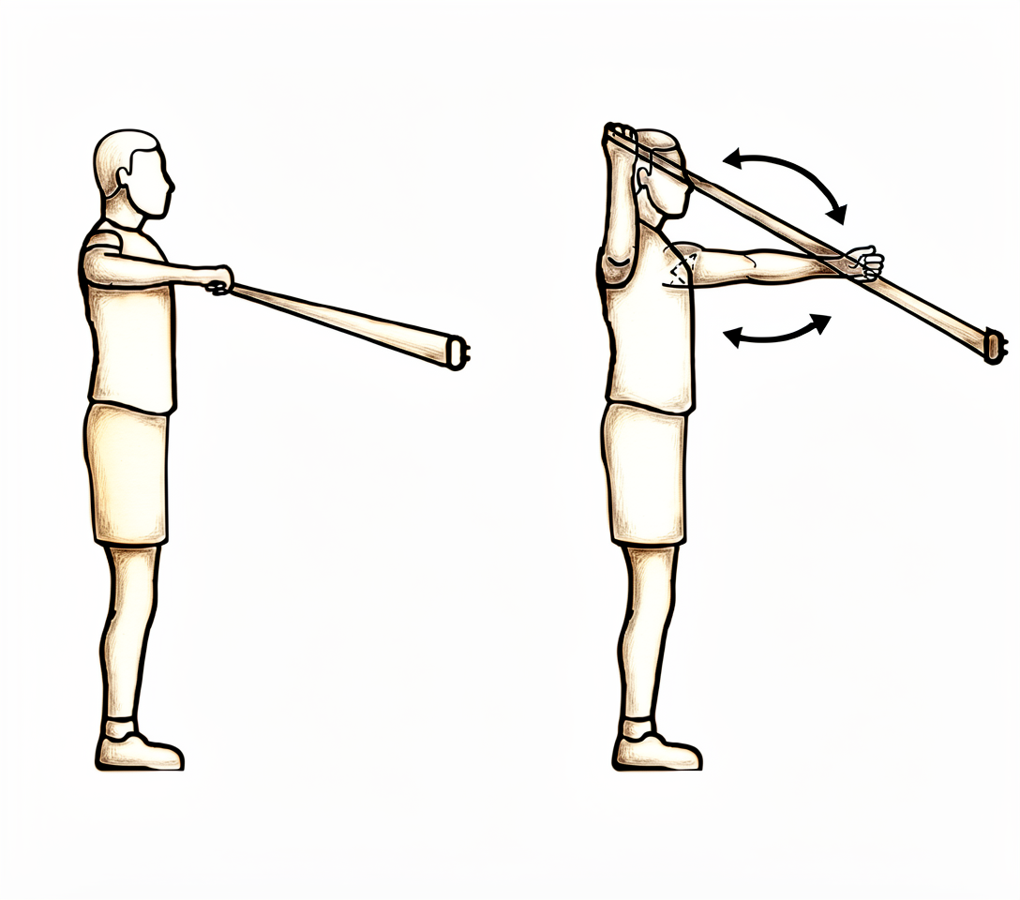
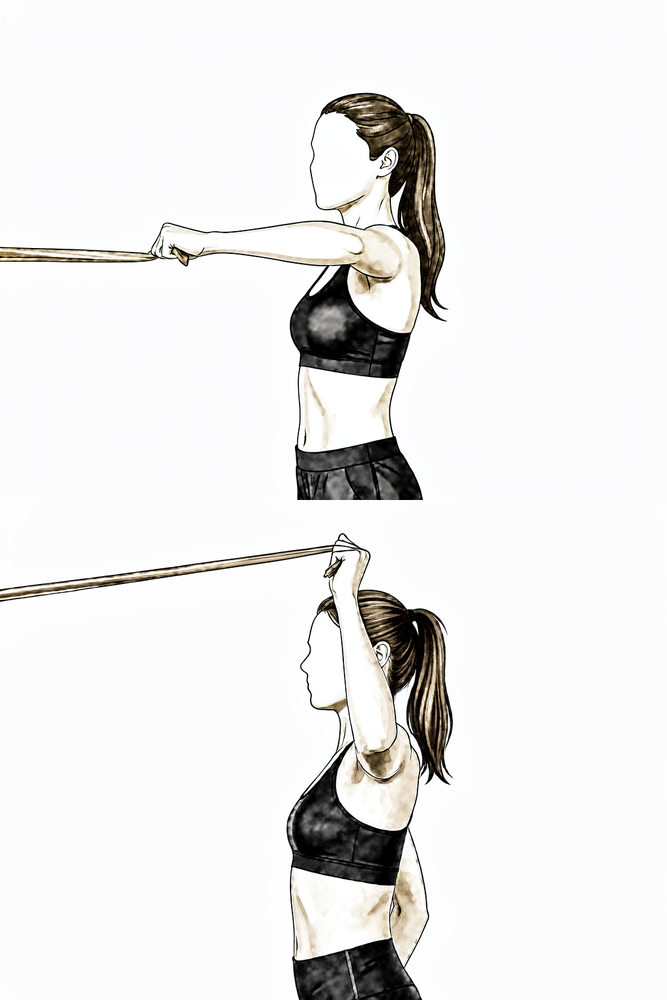
PNF diagonal D2 with a band
Holding a band, move the arm in a controlled diagonal — from your opposite hip out and up overhead — then reverse smoothly. Your physiotherapist will set the range. Begin only once you have full, pain-free movement.
As guided by your physiotherapist
Kieran Hirpara 4.0
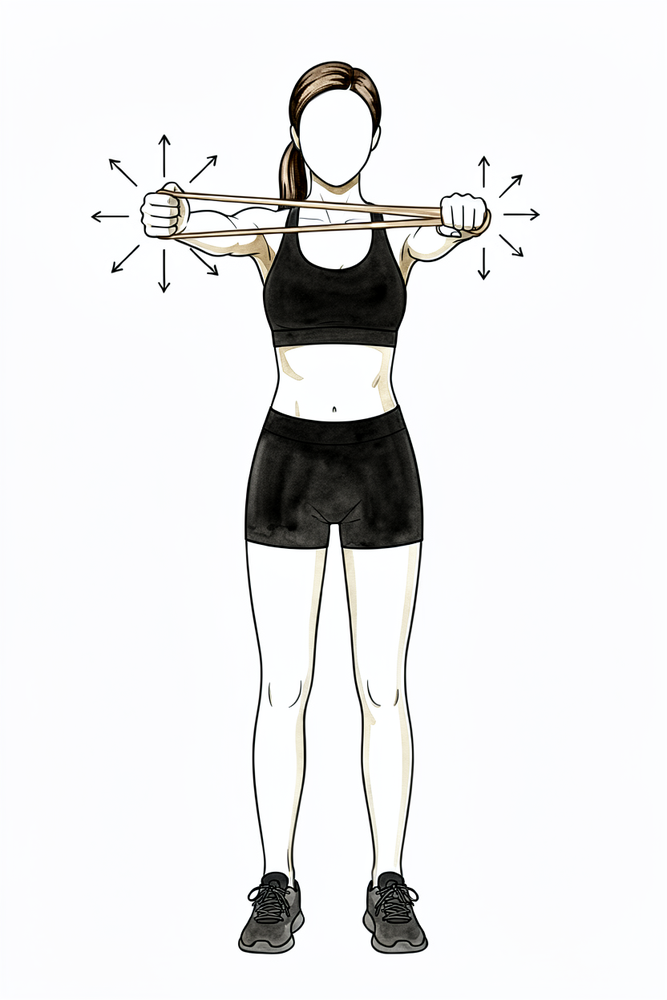
Band outward rotation
With your elbow tucked at your side and bent to 90 degrees, hold a band and rotate the forearm outward against the resistance, then return slowly. Keep the elbow tucked at your side.
10–15 times, once a day
Kieran Hirpara 4.0
Inward rotation with a stick
Hold a stick or towel and gently guide the operated hand inward across your tummy or behind your back, to a comfortable range. Inward rotation loads the repaired chest muscle, so this is introduced only from about week 9 and built up gently.
As guided by your physiotherapist
This is the turning point: from about week 9, the repaired chest muscle itself starts to work, gently. It begins in a shortened (relaxed) position and progresses towards a lengthened one as it tolerates the load. Inward rotation — the chest muscle's own action, deliberately held back until now — is also introduced here and built up slowly. Movement should be full, and the focus shifts to controlled, light loading. Heavier pressing still waits.
- Movement: full or nearly full passive and active movement in all directions (full by weeks 12–14 for a bone-tendon repair).
- Exercises: gentle inward-rotation and chest-muscle tensing drills, shortened position first; inward rotation with a stick; band outward rotation; PNF diagonal patterns with a band (controlled diagonal movements your physiotherapist sets up).
Ready for the next phase when: you have full, pain-free movement; and you can do the gentle chest-muscle drills without any pain afterwards.
Phase V — Strengthening (weeks 14–20)
Kieran Hirpara 4.0
Wall push-up to floor push-up
Start with push-ups against a wall: lean in, then push away, letting the shoulder blades spread apart at the top. As you get stronger, progress to a kitchen bench, then your knees, then the floor. Keep your elbows from travelling back past the line of your body — never let the chest drop below the level of your elbows.
As guided by your physiotherapist
Kieran Hirpara 4.0
Overhead triceps
With a light weight held overhead and the elbow bent, straighten the elbow to lift the weight, then lower slowly. Begin once overhead movement is full and comfortable.
10–15 times, once a day
Kieran Hirpara 4.0
Rhythmic stabilisation
With your arm supported in front of you at about shoulder height, have your physiotherapist (or your good hand) apply small, gentle pushes from different directions while you hold the arm still and steady — do not let it move. This trains the shoulder's stabilising muscles to react. Keep all the efforts gentle.
As guided by your physiotherapist
From about week 14, proper chest strengthening (light weights and resistance — "isotonics") begins, building up gradually and symmetrically with the other side. Push-up work starts against a wall and progresses towards the floor only as strength allows. Two gym rules now matter for a long time, because they load the repaired tendon the way that tears it: never let your elbows travel back past the line of your body at the bottom of a press, flye or pec-deck; and avoid heavy weights with low repetitions — favour lighter loads and more repetitions, and warm up slowly.
- Movement: full.
- Exercises: wall push-ups progressing towards the floor; inward rotation against a band; overhead triceps; light, progressive chest and pressing work; a gentle doorway chest stretch.
Ready for the next phase when: your strength is building evenly compared with the other side; and you have no pain with resisted chest work.
Phase VI — Early return to sport (5–6 months)
Kieran Hirpara 4.0
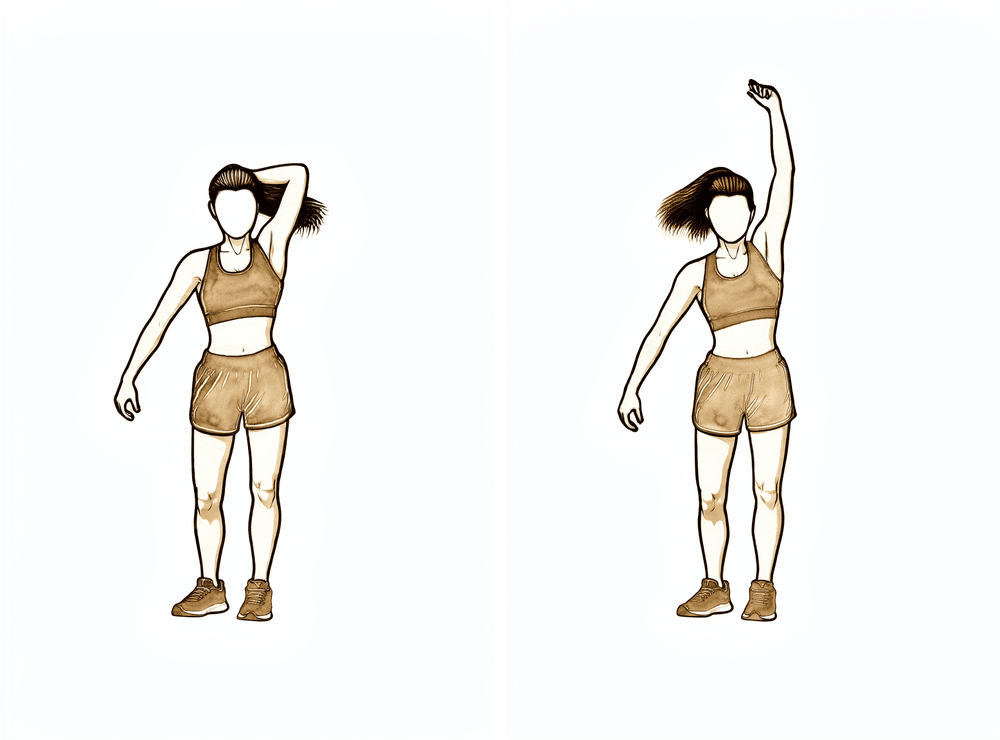
90/90 outward and inward rotation
With the arm out to the side at shoulder height and the elbow bent to 90 degrees, rotate the forearm up and down in a controlled range. This is a late-stage, sport-preparation drill — start only when cleared, as this position stretches the repaired chest muscle.
As guided by your physiotherapist
Kieran Hirpara 4.0
External rotation at 90/90 (band)
With the arm out to the side at shoulder height and the elbow bent to a right angle, rotate the forearm back and up against a light band or weight, then lower slowly. Builds rotator-cuff strength in the raised (throwing) position.
2 to 3 sets of 10 to 15, low resistance

Kieran Hirpara 4.0
Internal rotation at 90/90 (band)
From the same position with the arm out to the side at shoulder height, rotate the forearm forwards and down towards your feet against a light band or weight, then return with control.
2 to 3 sets of 10 to 15, low resistance
The arm is now strong and full-range, and training becomes specific to your sport — including faster, more explosive (plyometric) drills like chest passes and throwing positions. This is preparation for return to sport, not a green light for unrestricted heavy loading yet.
- Movement: full.
- Exercises: outward and inward rotation in the 90/90 (sport) position; plyometric chest and throwing drills as your physiotherapist directs.
Ready for the next phase when: you pass the strength and task-specific tests for your sport; and both Dr Hirpara and your physiotherapist clear you.
Phase VII — Unrestricted return (6 months onward)
From around six months, with clearance, you return to full strenuous work and recreation. The bench press is resumed at about half your previous maximum and built up slowly, and contact sport is not before six months. The return is based on your strength being at least 85–90% of the other side and on Dr Hirpara's clearance — not the calendar alone.
- Movement: full.
- Exercises: full return to heavy pressing and lifting, built up gradually from light loads, and full sport-specific training.
Ready when: your strength is at least 85–90% of the other side; you have full, pain-free movement and endurance with no reactive pain after heavy load; and both Dr Hirpara and your physiotherapist have signed off.
Returning to sport and work
The return to chest loading and sport is criteria-based — adequate range, strength and endurance, with no pain — and signed off by both Dr Hirpara and your physiotherapist, not decided by the calendar alone.
- Work: sedentary work as tolerated; manual or heavy work from at least 3 months.
- Driving: approximately 6 to 8 weeks.
- Light chest strengthening: from about week 14.
- Bench press, heavy lifting, push-ups and contact sport: not before 4 to 6 months, and only once your strength has returned — the bench press resumes at about half your previous maximum and is built up slowly.
For throwing and contact sports, complete a graded build-up programme before unrestricted play.
Your early exercises
Kieran Hirpara 4.0
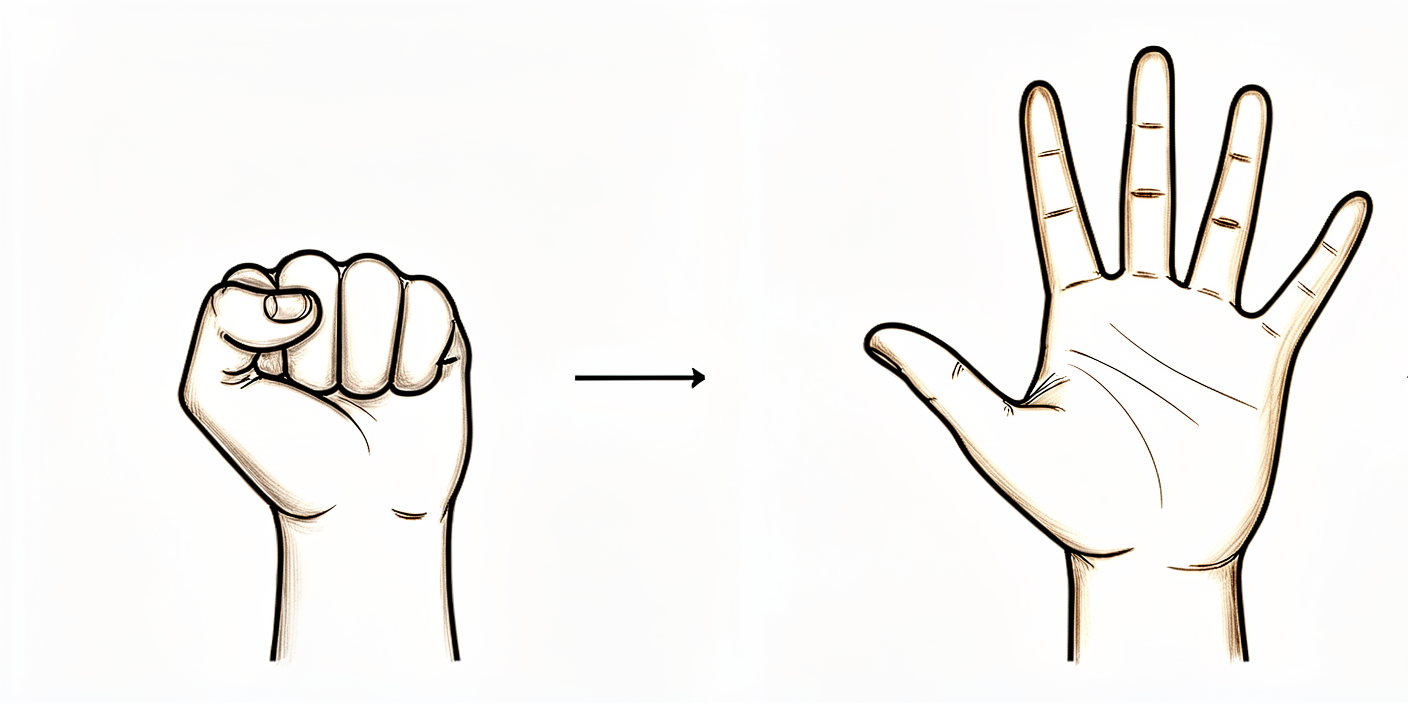
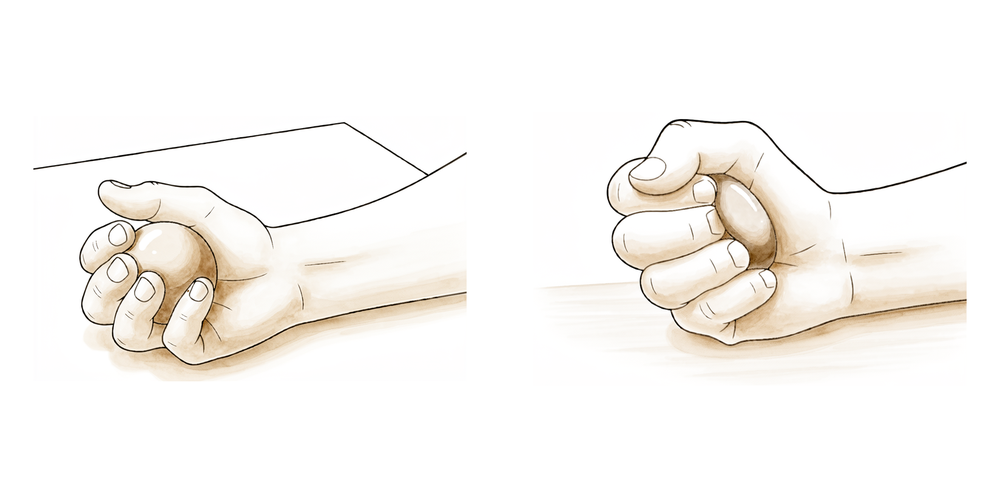
Open and close hand
Make a tight fist, then open the hand and spread the fingers fully. Keep your hand, fingers and wrist moving normally throughout the day.
10 times per hour
Kieran Hirpara 4.0
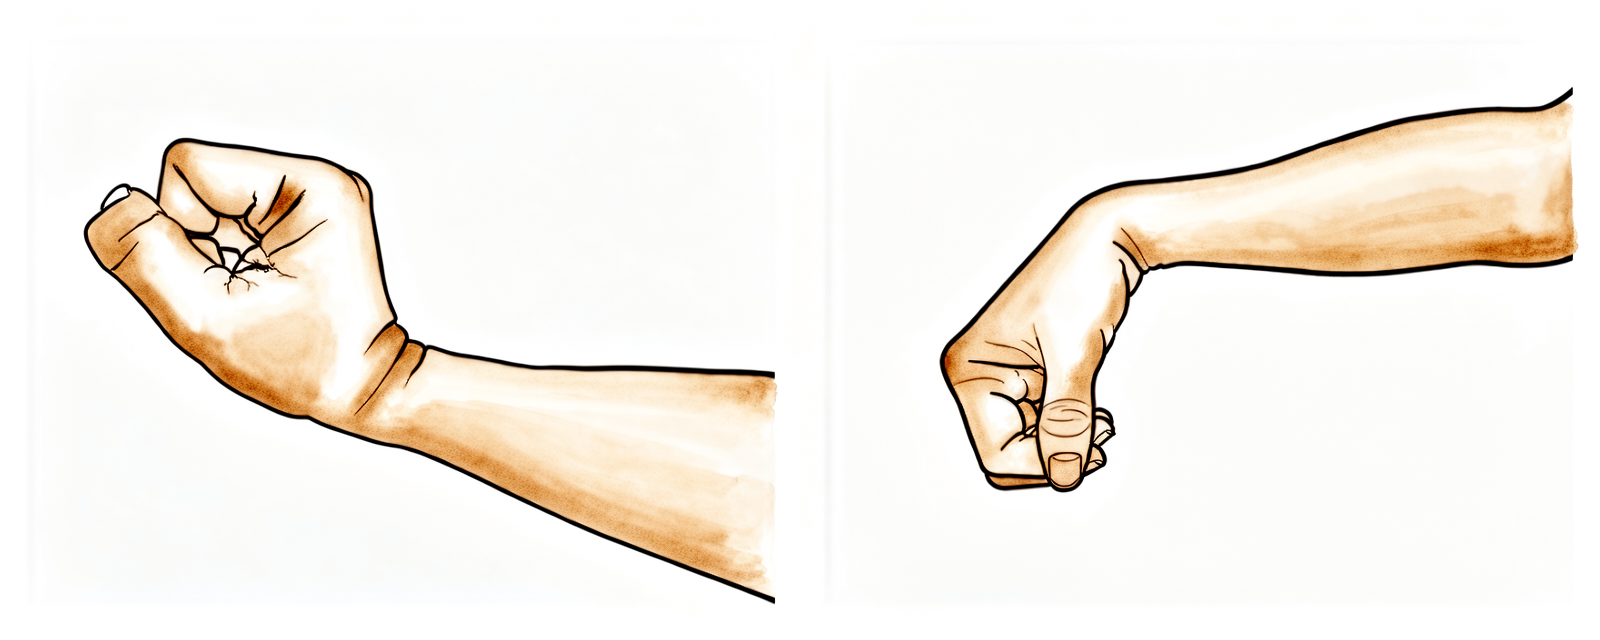
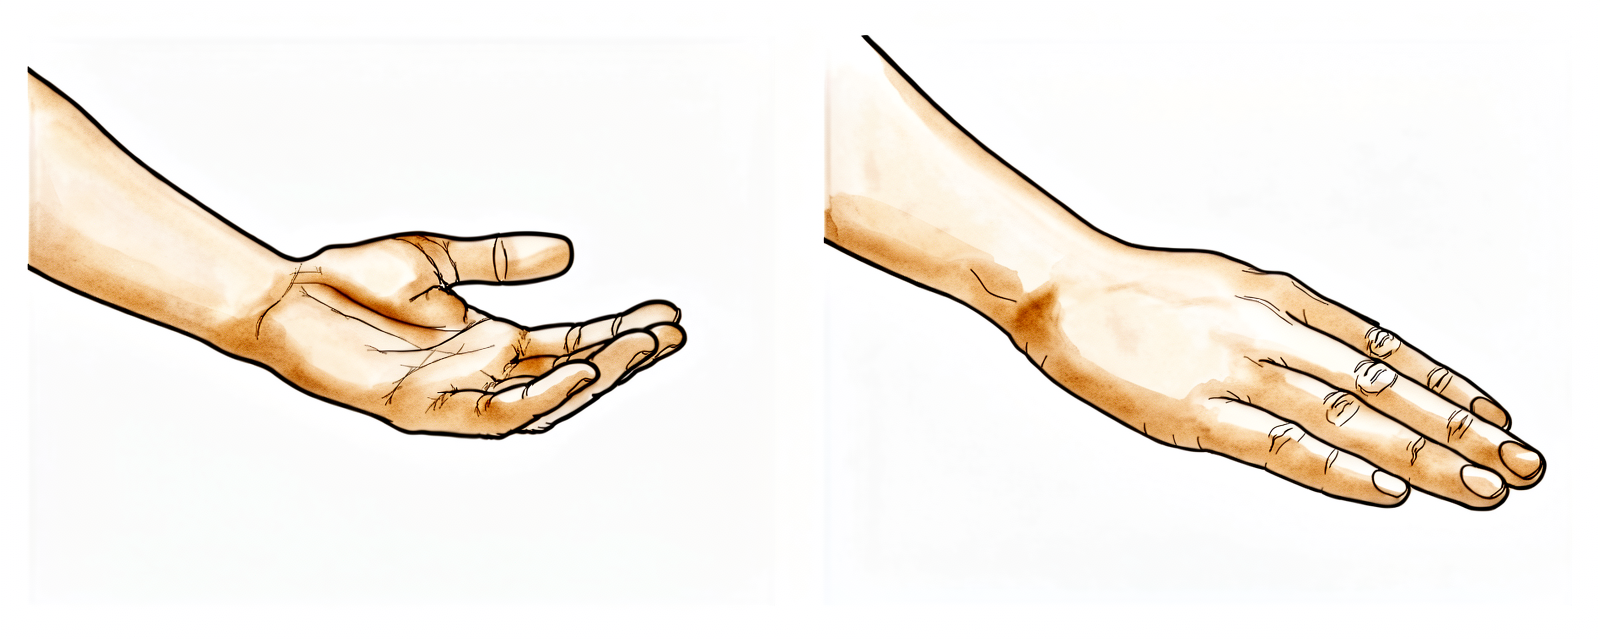
Wrist movement
With the forearm supported, bend the wrist forward as far as is comfortable, then back. Keep the movement gentle and regular through the day.
10–15 times per hour
Kieran Hirpara 4.0
Active elbow bends
With the upper arm resting by your side and in front of your body, bend the elbow as far as it will comfortably go, then straighten it fully. Only the elbow moves — the upper arm stays still.
10–15 times, 2–3 times a day
Kieran Hirpara 4.0
Forearm rotation
With the elbow bent to 90 degrees and tucked at your side, turn the forearm so the palm faces down, then up. Keep the elbow against your body so only the forearm rotates.
10 times, 2–3 times a day
Kieran Hirpara 4.0
Hand squeeze
With the arm supported and in front of your body, gently squeeze a soft ball or rolled-up sock, hold for a few seconds, then relax. This keeps the arm active without pulling on the repair.
10 times, 2–3 times a day
Kieran Hirpara 4.0
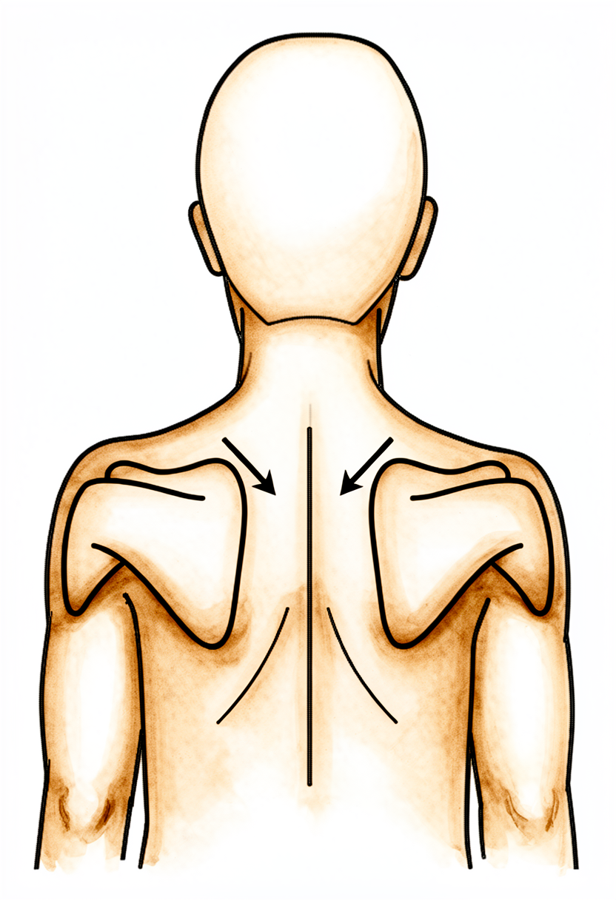
Scapula setting
Sitting or standing tall, gently draw your shoulder blades down and back together without moving the arms, hold for a few seconds, then relax. Keep your ears, shoulders and hips in line.
10 times, 2–3 times a day
Kieran Hirpara 4.0
Low row (shoulder-blade setting)
Sitting tall with the arm low and in front of you, gently draw the elbow down and back to set the shoulder blade, hold briefly, then relax. Keep the arm well below shoulder height — this works the muscles around the shoulder blade without loading the chest.
10 times, 2–3 times a day
Kieran Hirpara 4.0
External rotation to neutral
With the elbow bent to 90 degrees and tucked against your side, gently rotate the forearm from resting on your tummy until it points straight ahead (the neutral position — 0 degrees), then return. In the first weeks, stop at neutral; only go further outward by the small amount your physiotherapist sets each week. Do not take the arm out to the side.
As guided by your physiotherapist
Kieran Hirpara 4.0
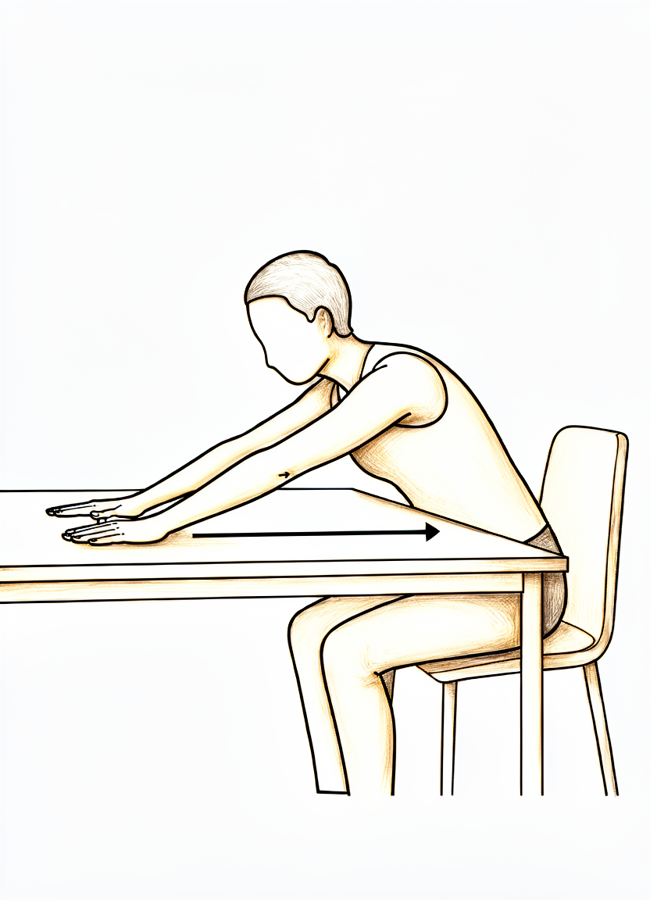
Flexion on the table (table slide)
Sit at a table with your forearm resting on it. Lean gently forward so your hand slides along the table, letting the table take the weight of the arm, then sit back up. Stay within the limit your physiotherapist has set — arm in front of your body, below shoulder height — and do not force or stretch.
As guided by your physiotherapist
These are the gentle exercises for the early (protection) phase, starting on the ward and continuing at home — done with your operated arm kept in front of your body and your shoulder muscles relaxed. Start them as guided by your physiotherapist, and stop anything that causes sharp shoulder pain. Remember the early rules: no pendulum or stick exercises yet, and never take the arm out to the side and rotate it outward at the same time.
After your protocol
This protocol works alongside the practice's general recovery advice — see managing post-operative pain and wound care.
Evidence & references
Pectoralis Major Tendon Repair -- Post-operative Rehabilitation
Topic scope: Rehabilitation after surgical repair of a pectoralis major (PM) tendon rupture/tear (typically a humeral-insertion avulsion in a 20-40 yr-old male, classically during the eccentric phase of a bench press). Covers protected positioning, the early restrictions on abduction (ABD) and external rotation (ER), ROM progression, when active ROM and strengthening start, and return to heavy lifting / bench press / sport.
Defining principle (contrast with frozen-shoulder release): PM repair rehab is a classic protect-the-repair protocol -- the OPPOSITE of frozen-shoulder release. The repaired tendon runs anteriorly to its humeral insertion; abduction and external rotation stretch/tension the repair, so both are strictly limited early and the arm is held in adduction + internal rotation in a sling/immobiliser. Progression is deliberately slow, and heavy resisted pec loading (bench press, flyes, dips, contact sport) is delayed to ~4-6 months to avoid re-rupture.
A key modifier throughout: repair type dictates the timeline. Bone-tendon repairs (suture anchors/cortical buttons into humerus) heal slower than tendon-tendon or muscle-tendon repairs and wean from the sling later (MGH protocol).
CONSENSUS PHASED TIMELINE
Synthesised from the Mass General Brigham (MGH) Sports Medicine protocol (rev. 7/2023, the most granular degree-by-degree protocol) and the University Orthopedics protocol, cross-checked against the published literature (Cordasco/HSS 2017; Manske & Prohaska 2007; Schepsis 2000; Haley/Zacchilli 2014). Both published protocols agree on the core structure; the ROM numbers below are the MGH degree targets.
| Phase | Window | Sling / position | ROM allowed + RESTRICTIONS | Active ROM | Strengthening | RTS / lifting |
|---|---|---|---|---|---|---|
| I -- Immediate | 0-3 wk (UnivOrtho: 0-2 wk) | Sling/immobiliser, arm in NEUTRAL or INTERNAL ROTATION, worn day & night | PROM only, started ~week 2. ER limited: start at 0 deg in adduction, progress ~5 deg/week. Flexion start 45 deg, +5-10 deg/wk. ABD start 30 deg, +5 deg/wk. Elbow/wrist/hand AROM free. No active shoulder motion; no ER beyond limit; no abduction/extension stretch | None at shoulder (distal joints only) | Wk 3: periscapular only (inferior glide <35 deg ABD, low row), ball squeeze. No pec loading | None |
| II -- Intermediate | 4-6 wk | Begin weaning sling: bone-tendon at 4 wk; tendon-tendon / muscle-tendon at 5-6 wk (UnivOrtho: immobiliser to 6 wk for all) | PROM continues (ER +5 deg/wk; flex +5-10 deg/wk to ~65-85 deg; ABD +5 deg/wk to ~50 deg). Begin AAROM (cane flexion, cane ER stretch, washcloth press). Still no aggressive ER/ABD past targets | AAROM introduced | Submaximal isometrics: ABD, extension, ER -- explicitly NO IR isometrics (IR/adduction tension the pec); periscapular setting | None |
| III -- Late | 6-8 wk | Sling discontinued | PROM continue to full (ER, flex, ABD each +5 deg/wk to full). Initiate AROM (supine flexion, salutes, supine punch). Can begin weight-bearing through arm | Active ROM starts ~6 wk | Sidelying ER, periscapular rows/extension, biceps/triceps; rhythmic stabilisation; sleeper/cross-body stretch | None |
| IV -- Transitional | 9-14 wk | None | Restore full PROM/AROM (full by wk 12-14 for bone-tendon) | Full | Initiate shoulder IR isometrics + pec major isometrics (~week 9) -- shortened position first, then lengthened; ER w/ band, ABD; PNF D1/D2 | None |
| V -- Advanced strengthening | 14-20 wk (~3.5-5 mo) | None | Full | Full | Pectoralis isotonics begin; IR w/ band, counter push-ups -> push-ups, lat pulldowns; doorway pec stretch gentle | Begin sport-specific prep |
| VI -- Early return to sport | 5-6 months | None | Full | Full | ER/IR at 90 deg, plyometrics (med-ball chest pass, ball drops, 90/90 throws) | Begin return-to-sport program when criteria met |
| VII -- Unrestricted RTS | 6+ months | None | Full | Full | Bench press resumed at 50% 1-RM, progress slowly with physician; full return to strenuous work, recreation, contact sport NOT before 6 months | Heavy lifting / bench press / contact sport: 6+ months, criterion-based |
Key numeric consensus points
- Sling: ~4-6 weeks (4 wk bone-tendon may wean earlier; 6 wk common; UnivOrtho keeps immobiliser a full 6 wk), arm in adduction/internal rotation.
- ER early limit: 0 deg at the side, advance ~5 deg/week -- because ER tensions the anterior repair.
- ABD/flexion early limit: ABD ~30 deg and flexion ~45 deg initially, advancing ~5-10 deg/week.
- Active ROM: ~6 weeks.
- Isometrics: scapular wk 3; submaximal shoulder (ABD/ext/ER, no IR) wk 4-6; pec/IR isometrics ~wk 9 (Phase IV).
- Pec isotonics / push-ups: ~14 weeks (Phase V).
- Bench press / heavy lifting / contact sport: deferred to ~4-6 months (MGH: 50% 1-RM bench at 6+ mo; UnivOrtho: light bench from ~4 mo with very light resistance, no contact until 6 mo).
The rationale for restricting ER and ABD is biomechanical: the PM is a strong adductor, internal rotator and flexor; abduction + external rotation is the position of maximal stretch on the anterior insertion (this is the injuring mechanism -- eccentric load in abduction/ER, e.g. bench press), so it maximally tensions the repair (Maier 2021; Schepsis 2000; Provencher 2010). Biomechanical work shows transosseous sutures, suture anchors and cortical buttons confer similar repair strength, and early activity should stay below identified failure loads until soft-tissue- to-bone healing is reliable (Sherman 2012; Edgar 2017) -- the biomechanical basis for the slow progression.
OUTCOMES / RETURN TO SPORT EVIDENCE
- Surgical > non-operative for restoring strength/function: objective strength testing shows repair recovers significantly more peak torque and work than conservative care (Hanna 2001 -- comparative cohort); literature "strongly supports early operative treatment" of complete tears in active patients/athletes (Kircher 2010 review; Schepsis 2000). Acute repair > chronic/delayed repair (Schepsis 2000).
- Return to sport in repaired athletes is generally good, with most returning by ~6 months to a year; Cordasco (HSS, 2017, n=40 acutely repaired athletes) reported high RTS and functional scores with low re-operation. Faster individual returns (5-7 mo) are reported in single cases but 6 months is the consensus floor for heavy/contact loading.
KEY CONTROVERSIES / VARIABLES
- Sling duration & wean point. 4 wk vs 6 wk; MGH ties it to repair type (bone-tendon later); UnivOrtho fixes 6 wk for all. No RCT defines the optimum. Weak/consensus.
- How fast to advance ER/ABD. ~5 deg/week is widely used but arbitrary; tissue quality, tear size and fixation method modify it -- larger tears / poor tissue / chronic repairs progress slower. Expert opinion.
- Repair construct. Cortical button vs suture anchor vs transosseous -- biomechanically similar (Sherman 2012; Edgar 2017), so construct should not, in principle, change the rehab timeline, but surgeons individualise. Strong biomechanical, weak clinical.
- RTS timing for bench press / contact sport. Range 4-6 months across protocols; no high-level evidence sets the safe threshold -- driven by re-rupture fear and biomechanical failure-load data, not RCTs. Weak/consensus.
- Acute vs chronic / augmentation. Chronic or retracted tears may need allograft or autograft (semitendinosus) augmentation and a more conservative timeline (Neumann 2018 dermal allograft: 6 wk full immobilisation then 4-phase PT from wk 6; Garofo 2025 semitendinosus technique). Weak (technique notes/small series).
- Overall evidence base. Almost entirely retrospective cohorts, technique notes and biomechanical studies -- no RCTs of one rehab protocol vs another for PM repair. The whole timeline is consensus/expert, anchored by biomechanical failure-load data. Flag: WEAK.
EVIDENCE STRENGTH FLAGS (summary)
- STRONG: biomechanical failure-load / repair-construct comparisons (Sherman 2012; Edgar 2017 -- cadaveric, controlled) -- these justify the load restrictions.
- MODERATE: surgical vs conservative superiority (Hanna 2001 comparative; Schepsis 2000; Cordasco 2017 n=40 outcome series; Campbell's / Pochini 2014 prospective 60-case series).
- WEAK / CONSENSUS ONLY: every specific rehab parameter -- sling duration, ER/ABD degree-per- week limits, AROM/strengthening start weeks, 4-6 month RTS/bench-press timing. Derived from institutional PT protocols (MGH, University Orthopedics) and narrative reviews (Manske/Prohaska 2007; Haley/Zacchilli 2014; Maier 2021), not RCTs.
CITATIONS
RAG corpus (180,000+ Orthopaedic articles)
- Cordasco FA, Mahony GT, Tsouris N, et al. Pectoralis major tendon tears: functional outcomes and return to sport in a consecutive series of 40 athletes. J Shoulder Elbow Surg. 2017;26(3):458-463.
- Kang RW, Mahony GT, Cordasco FA. Pectoralis major repair with cortical button technique. Arthroscopy Techniques. 2014.
- Haley CA, Zacchilli MA. Pectoralis major injuries. Clin Sports Med. 2014.
- Schepsis AA, Grafe MW, Jones HP, et al. Rupture of the pectoralis major muscle. Am J Sports Med. 2000;28(1):9-15.
- Sherman SL, Lin EC, Verma NN, et al. Biomechanical analysis of the pectoralis major tendon and comparison of techniques for tendo-osseous repair. Am J Sports Med. 2012.
- Hanna CM, Glenny AB, Stanley SN, et al. Pectoralis major tears: comparison of surgical and conservative treatment. Br J Sports Med. 2001.
- Kircher J. Surgical and nonsurgical treatment of total rupture of the pectoralis major muscle in athletes: update and critical appraisal. Open Access J Sports Med. 2010.
- Maier J, Oak SR, Soloff L, et al. Management of common upper extremity injuries in throwing athletes: a critical review of current outcomes. JSES Rev Rep Tech. 2021;1(4).
- Neumann JA, Klein CM, van Eck CF, et al. Outcomes after dermal allograft reconstruction of chronic or subacute pectoralis major tendon ruptures. Orthop J Sports Med. 2018. (6 wk full immobilisation; PT from wk 6, 4 phases)
- Garofo AGP, Medina G, Schor B. Acute pectoralis major tendon tear reconstruction with semitendinosus augmentation: a technique note. JSES Rev Rep Tech. 2025;5(4).
- Azar FM, Canale ST, Beaty JH. Campbell's Operative Orthopaedics (cites Pochini 2014 prospective 60-case series; Edgar 2017 repair-configuration biomechanics; ElMaraghy classification). 2020.
- (Provencher MT, Handfield K, Boniquit NT, et al. Injuries to the pectoralis major muscle: diagnosis and management. Am J Sports Med. 2010;38(8):1693-1705 -- cited within MGH protocol.)
- (Manske RC, Prohaska D. Pectoralis major tendon repair post-surgical rehabilitation. N Am J Sports Phys Ther. 2007;2(1):22-33 -- cited within MGH protocol.)
Published rehab protocols (URLs)
- Mass General Brigham (MGH) Sports Medicine -- Rehabilitation Protocol for Pectoralis Major Repair (rev. 7/2023): https://www.massgeneral.org/assets/MGH/pdf/orthopaedics/sports-medicine/physical-therapy/rehabilitation-protocol-for-pectoralis-major-repair.pdf (source for the degree-by-degree ER 0 deg +5/wk, flex 45 deg, ABD 30 deg limits; sling neutral/IR; bone-tendon vs tendon-tendon wean; pec isometrics wk 9, pec isotonics wk 14; bench 50% 1-RM at 6+ mo).
- University Orthopedics, Inc. -- Pectoralis Major Repair Rehabilitation Protocol: https://universityorthopedics.com/assets/shoulder/PECTORALIS-MAJOR-REPAIR.pdf (immobiliser x6 wk; AROM ~6 wk; phased push-up progression; light bench from ~4 mo; no contact sport until 6 mo).
- Additional concordant institutional protocols: Melbourne Orthopaedic Group https://mgorthopaedics.com.au/wp-content/uploads/2021/04/PECTORALIS-MAJOR-REPAIR-PROTOCOL.pdf ; Summit Orthopedics https://www.summitortho.com/wp-content/uploads/2022/08/6575_SURGICAL-Pect-Major-Repair-Protocol_6.22_MB.pdf