AC Joint Stabilisation Info Evidence
Last reviewed
Rehabilitation after AC joint stabilisation or reconstruction, with the protective phase and staged return to sport.
This protocol covers the rehabilitation after acromioclavicular (AC) joint stabilisation with Dr Kieran Hirpara at Mater Private Hospital Rockhampton — surgery that restores the alignment of the joint between the collarbone and the shoulder blade after a dislocation, using a suspensory device, sometimes with a tendon graft. Bring this page or its PDF to your first physiotherapy visit so your rehabilitation stays coordinated. Your rehabilitation is progressed individually by your physiotherapist through the phases below, depending on how your shoulder progresses.
If you have any concerns about your wound after surgery, get in touch with the rooms. It is often helpful to take a photo of the wound and email it for review.
What to expect
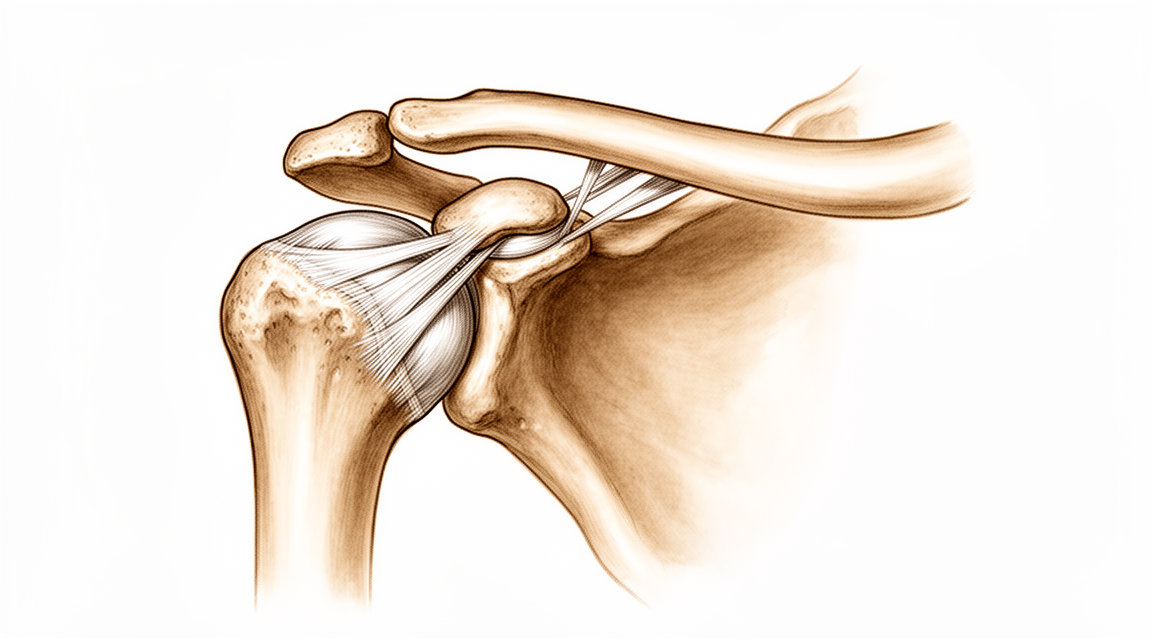
AC joint stabilisation is different from most keyhole shoulder surgery: there is a repair that must be protected while it heals, and the thing that loads it most is simply the weight of your own arm. Gravity constantly pulls the arm — and with it the shoulder blade — downwards, away from the collarbone, which is exactly the direction the stabilisation has to resist. Early rehabilitation is therefore deliberately protective: the sling carries the weight of the arm, movement is kept within safe limits, and strengthening waits until the repair has matured.
The sling is protective. Wear it for 6 weeks, and for the first three weeks keep it on while sleeping too — even lying down, the weight of the arm pulls on the repair. After three weeks it can come off in bed. When the sling is off for washing or exercises, keep the arm supported — rest the forearm on a pillow or table rather than letting the arm hang or carry anything. At night, most people are most comfortable on their back or on the non-operated side; if you lie on your back, a small pillow under the elbow and forearm stops the shoulder sagging backwards. Avoid lying on the operated shoulder while the repair heals.
You must not drive while you are wearing a sling. For this operation that usually means about six weeks.
Your exercise program uses three kinds of movement, and your team will mark which apply to you:
- Active range of motion — movement is allowed without aid or help.
- Active-assisted range of motion — using the other arm or an object to assist with moving the arm.
- Passive range of motion — completely relaxed, using the other arm or force to do 100% of the work.
The journey at a glance:
- Phase I — Protecting the repair — weeks 0–6
- Phase II — Restoring your movement — weeks 6–12
- Phase III — Strengthening — weeks 12–18
- Phase IV — Return to sport and heavy work — week 18 onwards
The week ranges are typical rather than fixed — published protocols for this operation vary, and your physiotherapist will progress you on how the repair and your movement are going, not on the calendar. Most people are using the arm for normal daily activities by around three months. Return to contact and collision sport typically takes around four to six months, and for some sports and occupations the build-up runs longer.
Phase I — Protecting the repair (Weeks 0–6)
Kieran Hirpara 4.0
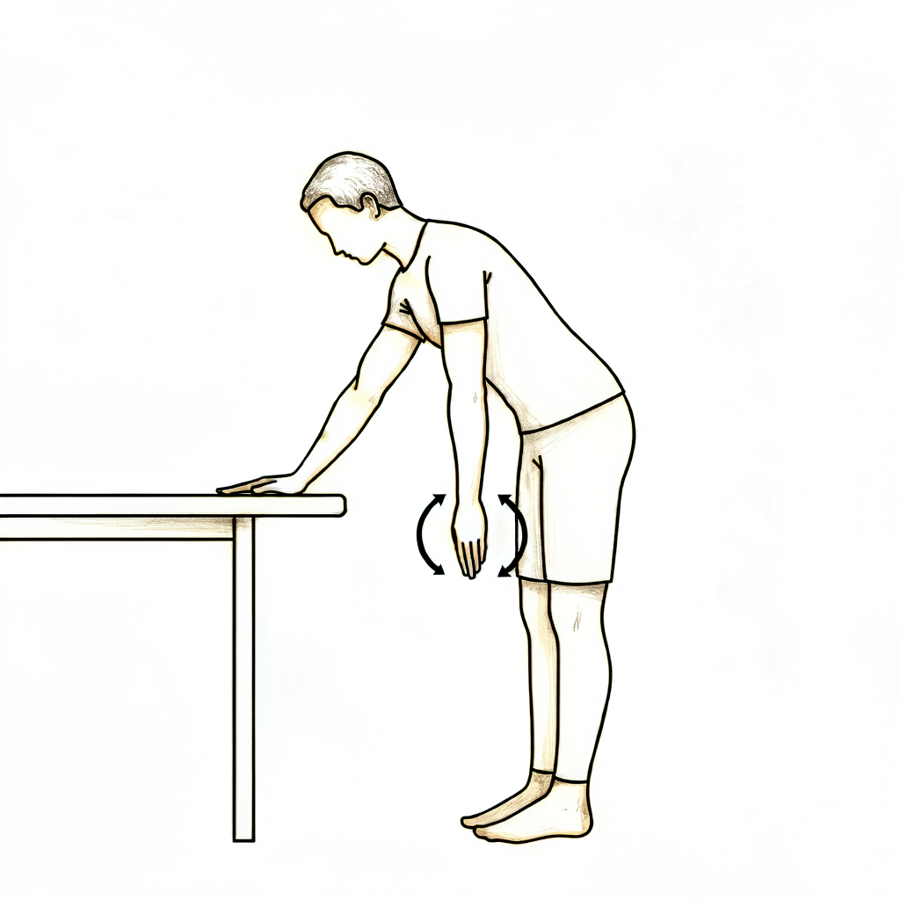
Pendulum exercise
Out of the sling, bend forward at the waist and let the operated arm hang gently away from the body. Let the arm swing in small, relaxed circles — the movement comes from your body, not the shoulder muscles. Stay within comfort, then support the arm back into the sling.
Several times a day
Kieran Hirpara 4.0
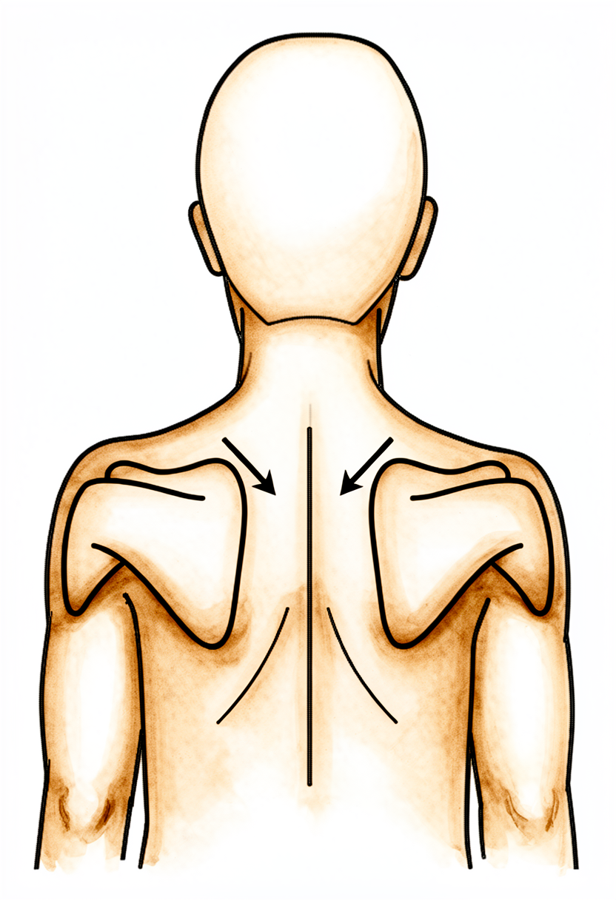
Scapular setting
Sitting or standing tall with the arm supported, gently draw your shoulder blades back together and down, away from your ears. Hold for a few seconds, then relax. This keeps the posture muscles working without loading the repair.
As guided by your physiotherapist
Kieran Hirpara 4.0
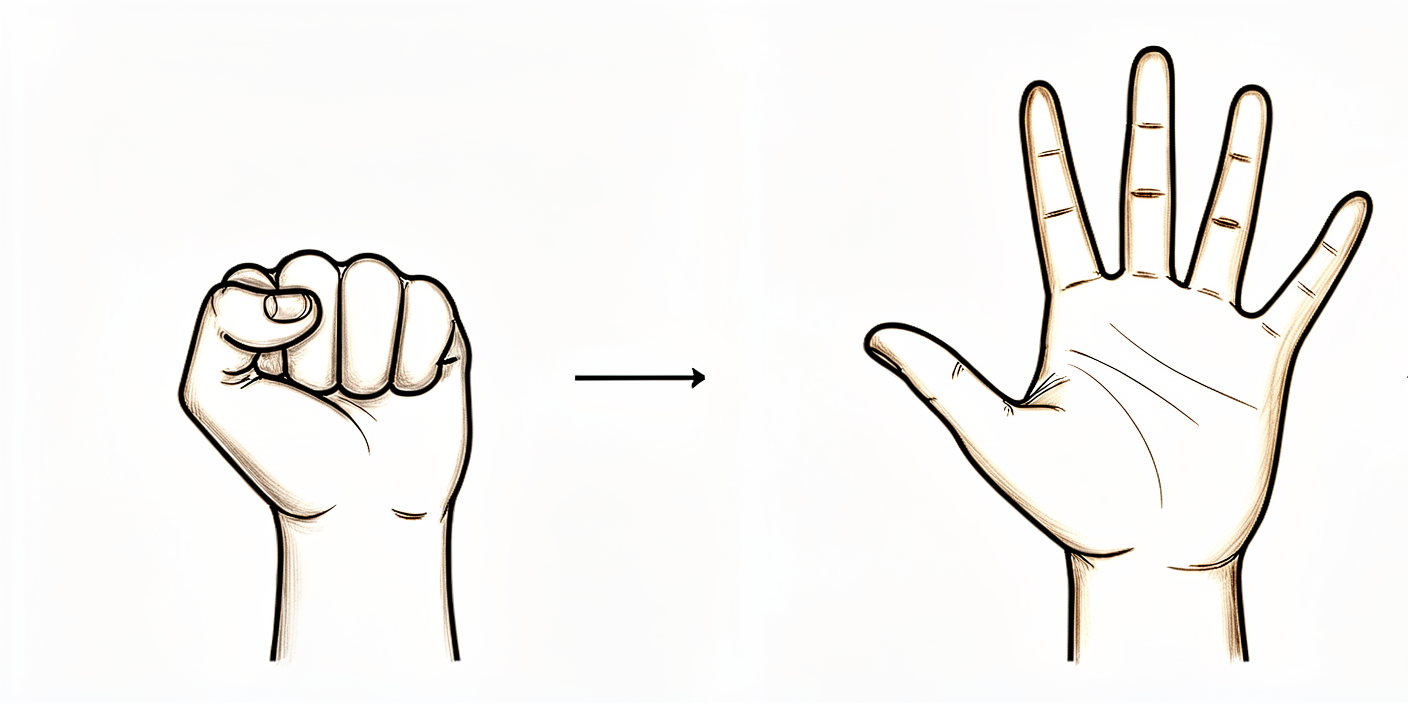
Hand and grip exercises
With the arm supported in the sling, make a full fist, then open the fingers out straight. A soft ball or rolled-up sock can be squeezed for grip work. Keep the hand, wrist and elbow moving from day one.
As guided by your physiotherapist
Kieran Hirpara 4.0
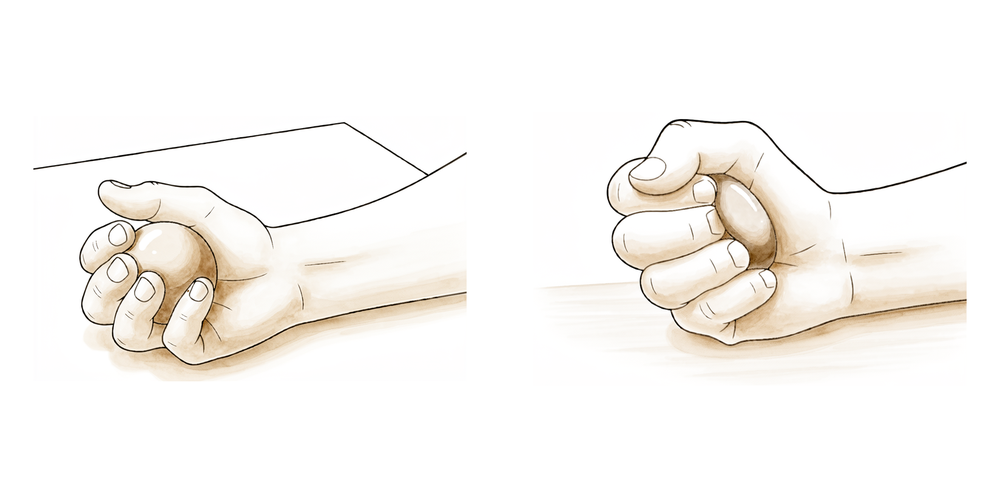
Ball squeeze
With the arm supported in the sling, hold a soft ball or rolled-up sock and squeeze it firmly, then release. This keeps the grip and forearm working while the shoulder is protected.
As guided by your physiotherapist
Kieran Hirpara 4.0
Wrist movement
With the arm out of the sling and the forearm supported, bend your wrist forwards, backwards and side to side. Keeping the wrist moving from day one stops it stiffening while the repair is protected.
As guided by your physiotherapist
Kieran Hirpara 4.0
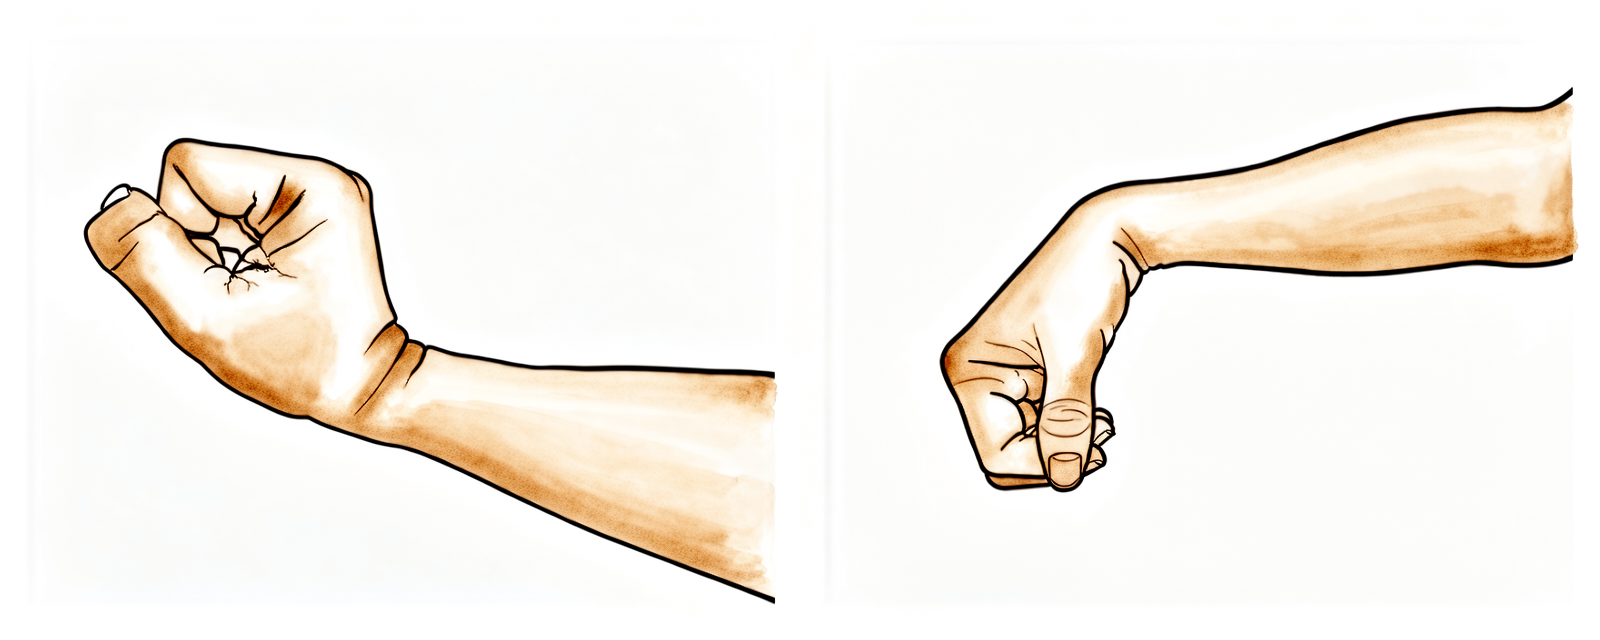
Elbow bends
With the upper arm supported by your side, bend the elbow as far as it comfortably goes, then straighten it fully. Only the elbow moves — keep the shoulder relaxed and supported so the repair is not loaded.
As guided by your physiotherapist
Kieran Hirpara 4.0
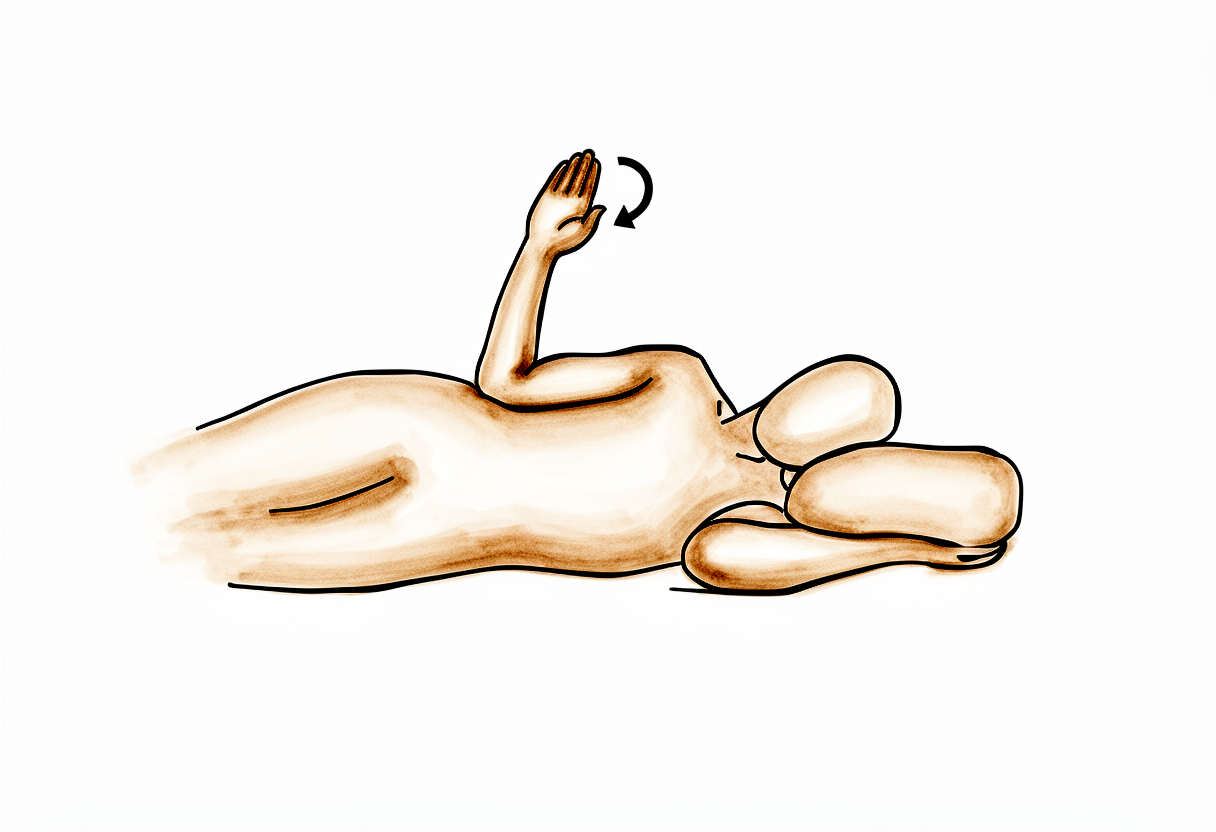
Forearm rotation
With the elbow tucked at your side and bent to a right angle, turn the palm up towards the ceiling, then down towards the floor. The forearm rotates while the shoulder stays still and supported.
As guided by your physiotherapist
Kieran Hirpara 4.0
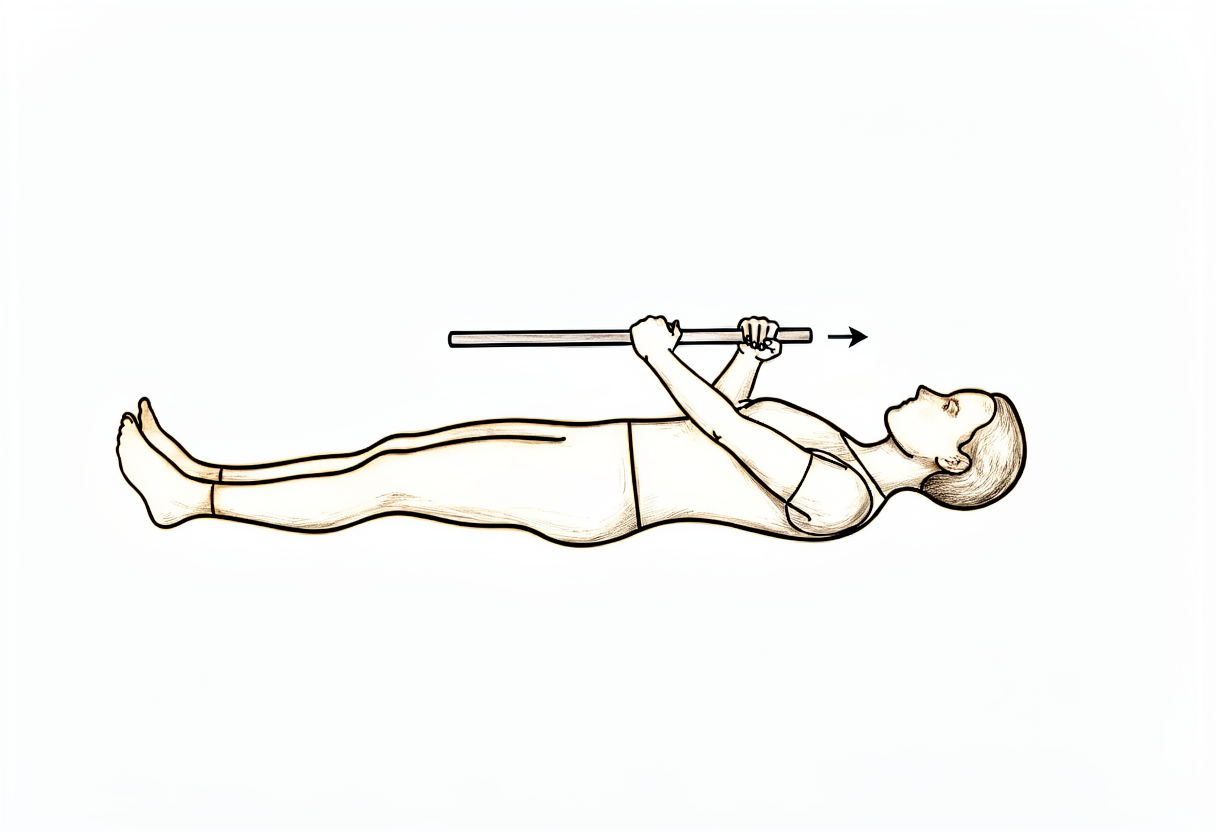
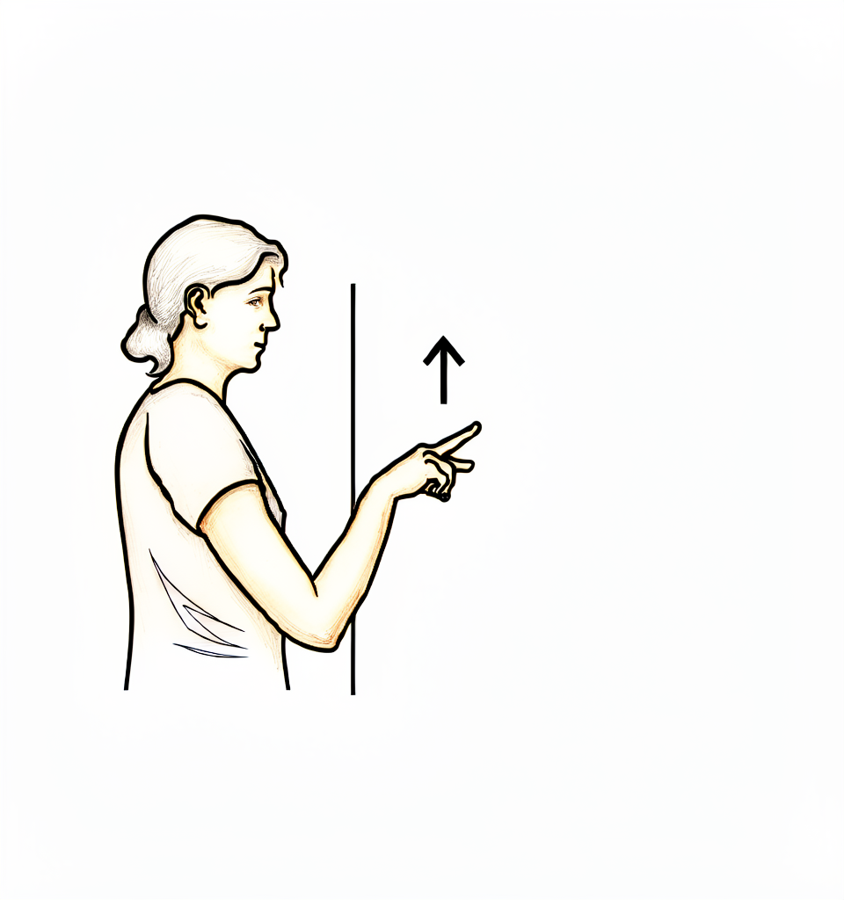
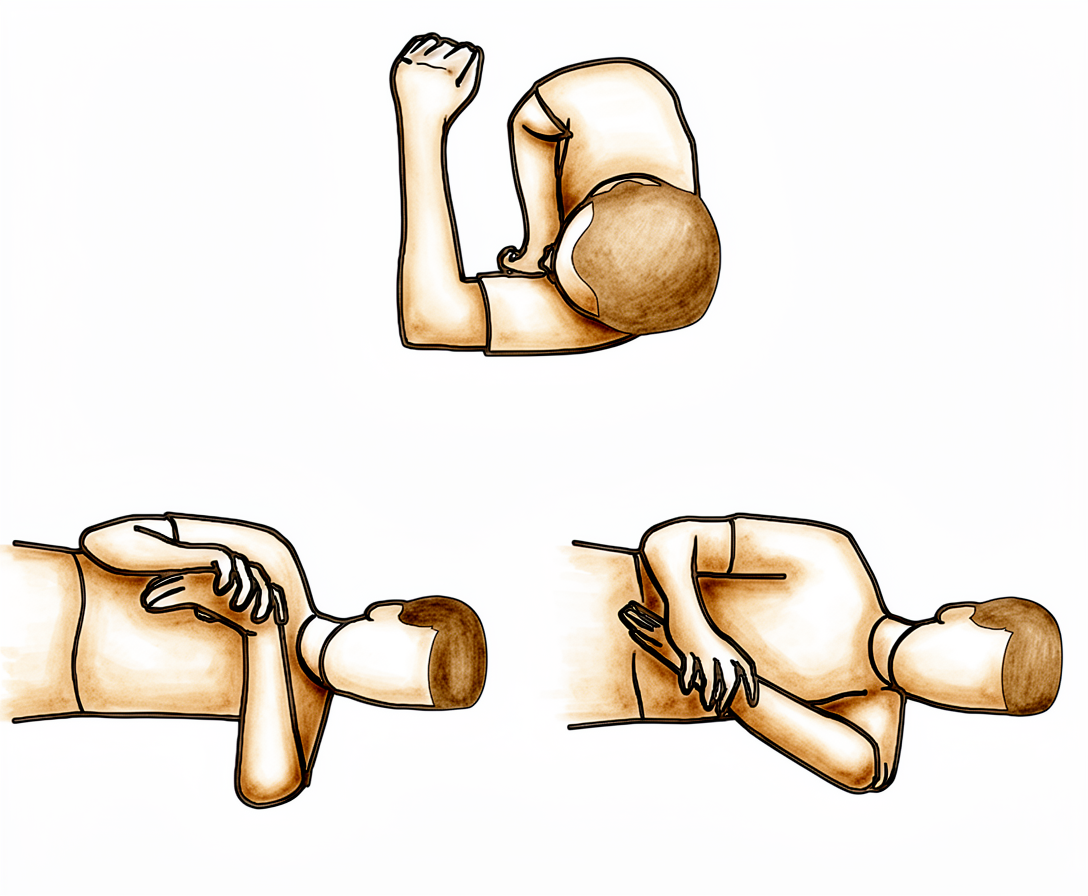
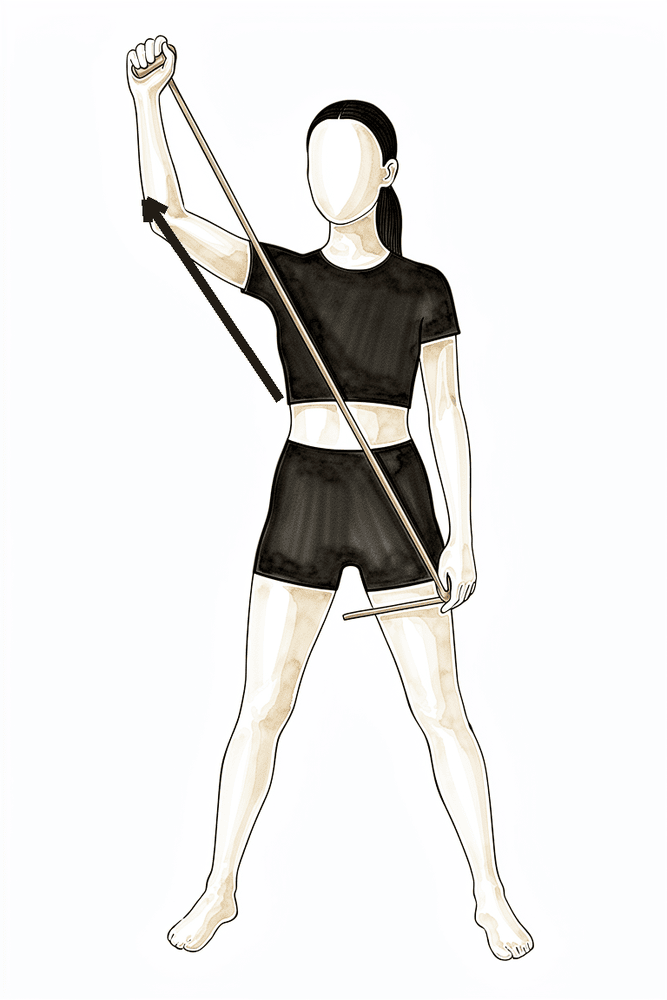
Assisted external rotation with a stick
Lie on your back with the operated elbow tucked by your side and bent to a right angle. Hold a stick in both hands and let the good arm gently turn the operated forearm outwards, only as far as comfort allows in this phase. Return slowly and keep the movement small and supported.
As guided by your physiotherapist
Kieran Hirpara 4.0
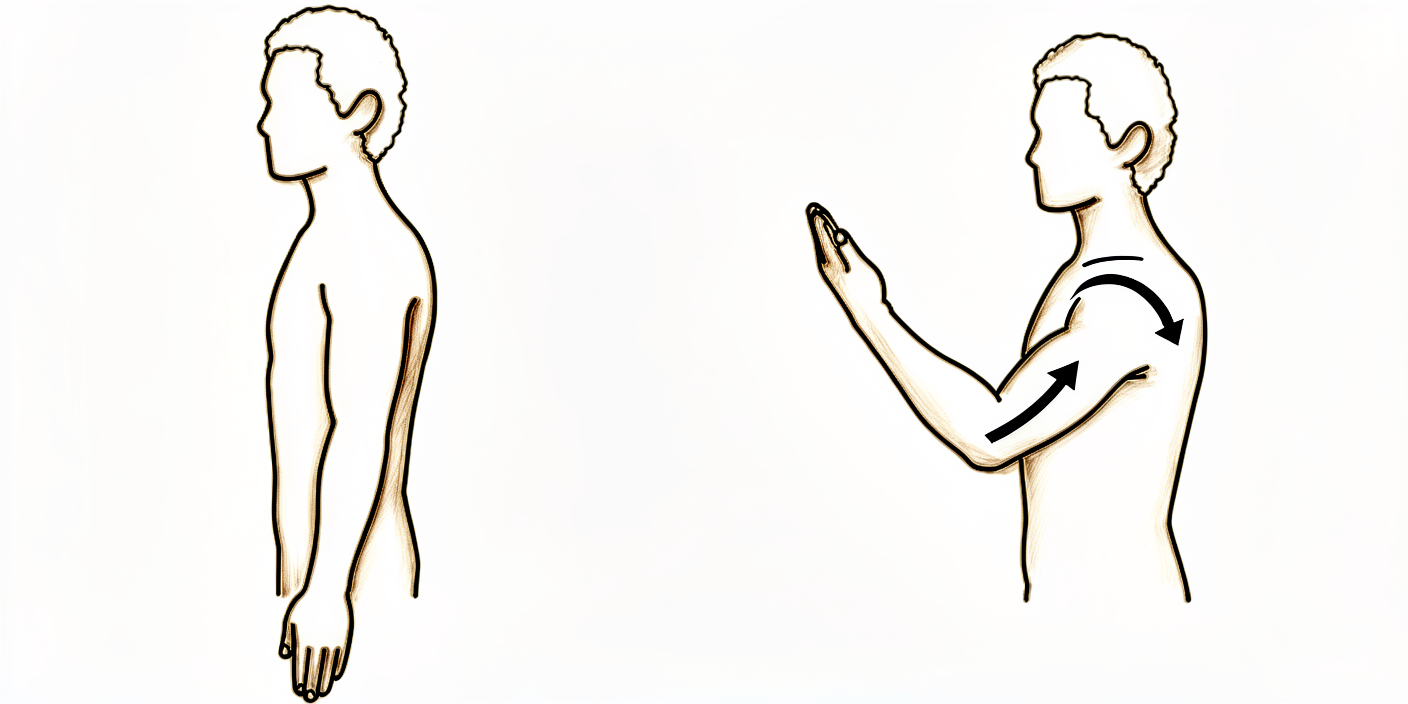
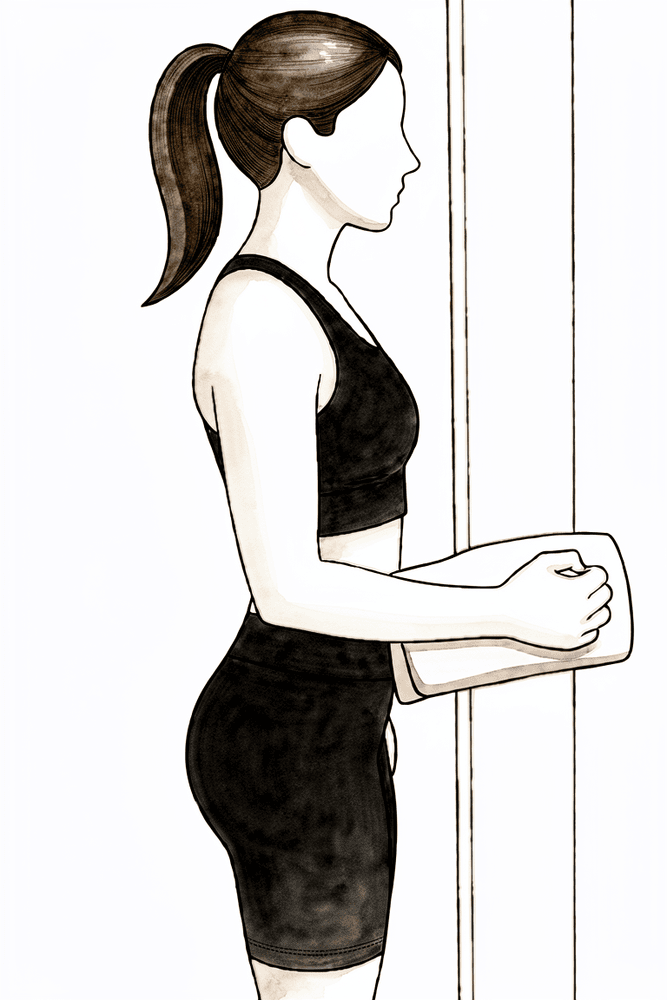
Isometric external rotation
Stand with your elbow tucked at your side and bent to a right angle, the back of your hand against a wall or doorframe. Gently press outwards into it without letting the arm move, hold a few seconds, then relax. The shoulder works but does not move, so the repair is not loaded.
Sub-maximal and pain-free; as guided by your physiotherapist
Kieran Hirpara 4.0
Isometric internal rotation
Stand with your elbow tucked at your side and bent to a right angle, the palm against a wall or doorframe. Gently press inwards into it without letting the arm move, hold a few seconds, then relax. A no-movement way to keep the rotator cuff active early on.
Sub-maximal and pain-free; as guided by your physiotherapist
The first six weeks are about letting the repair heal while keeping the rest of the arm moving. The sling carries the weight of the arm whenever you are up and about. Your hand, wrist and elbow should keep moving from day one — use the hand for light tasks such as writing and eating while the arm is in the sling. The shoulder itself starts with gentle pendulum exercises and assisted movements within strict limits: nothing above shoulder height, no reaching across your body, and no reaching behind your back. Ice and regular pain relief make the exercises manageable — take your painkillers before your exercises and physiotherapy sessions. You can shower once your wound care advice allows; to wash under the operated arm, bend forward at the waist and let the arm fall gently away from the body, the same position as the pendulum exercise.
During this phase, do not lift anything heavier than about half a kilogram with the operated arm, do not carry bags on that side, do not lean on the arm or use it to push yourself up from a bed or chair, and do not let the arm hang unsupported — each of these pulls the shoulder blade down away from the collarbone and loads the repair.
For your physiotherapist:
Goals
- Protect the surgical stabilisation and allow soft-tissue healing
- Control pain and swelling; protect wound healing
- Prevent shoulder stiffness within the protected ranges
- Maintain hand, wrist, elbow and neck range of motion
Management
- Sling for 6 weeks whenever up and about; arm supported when the sling is off
- Pendulum exercises several times daily
- Passive and active-assisted elevation in the plane of the scapula, limited to 90 degrees
- Passive and active-assisted external rotation as comfort allows (initially to around 30 degrees)
- Hand, wrist, elbow and forearm active range of motion; ball squeeze
- Scapular setting — retraction and depression — and postural correction
- Sub-maximal, pain-free isometric internal and external rotation in neutral as tolerated
- Soft-tissue and scapulothoracic mobilisation as indicated; scar massage once the wound has healed
- Ice 15–20 minutes, several times daily, as needed; analgesia before exercises and sessions
Precautions
- Do not let the weight of the arm pull on the fixation — no hanging arm, no carrying, no downward traction
- No elevation above 90 degrees in any plane
- No active shoulder range of motion beyond the prescribed assisted program
- No cross-body (horizontal) adduction and no internal rotation behind the back
- No lifting heavier than about half a kilogram; no supporting body weight through the arm
- No driving while in the sling
Criteria to progress
- Around 90 degrees of passive flexion in the plane of the scapula
- Around 30 degrees of passive external rotation in the plane of the scapula
- Tolerating the range-of-motion and isometric program, with pain and swelling settling
Phase II — Restoring your movement (Weeks 6–12)
Kieran Hirpara 4.0
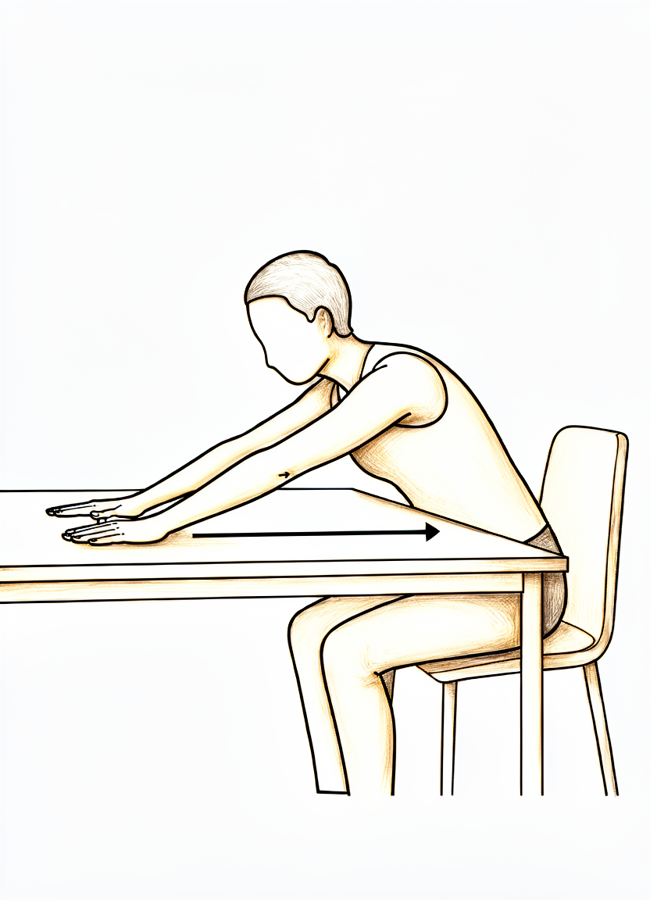
Countertop slide
Sit at a table or bench with your hands resting on the surface. Slide the hands forward, letting your trunk lean in so the shoulder bends upward with support, then return. Move smoothly within comfort, without hitching the shoulder towards the ear.
As guided by your physiotherapist
Kieran Hirpara 4.0
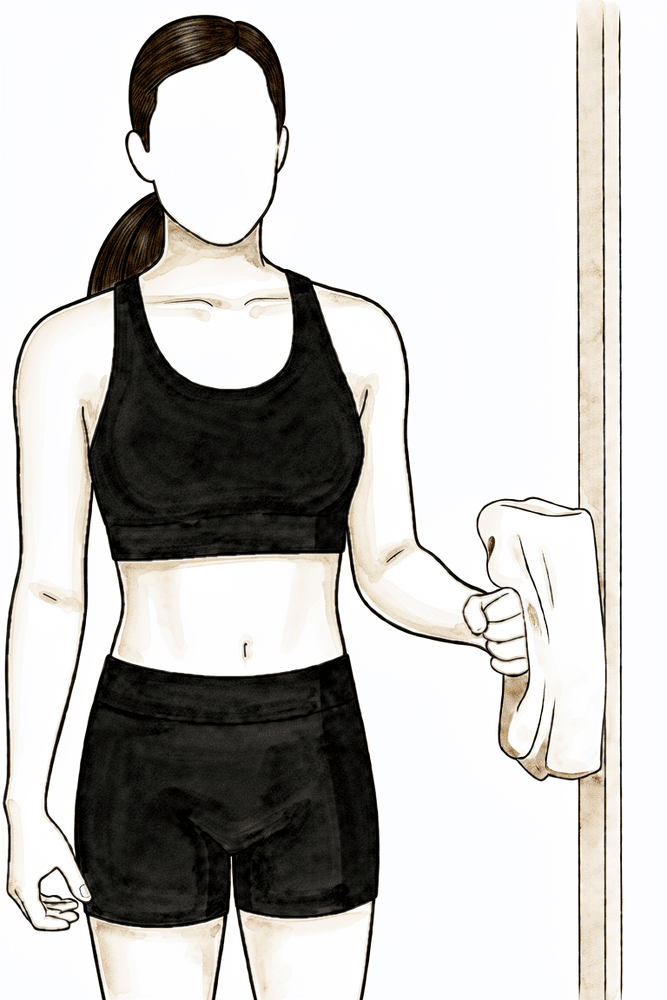
Elastic-band row
Anchor an elastic exercise band in front of you at about waist height. Pull the band towards you, drawing the shoulder blade back and down as the elbow travels past your side, then return with control. Keep the resistance light in this phase.
As guided by your physiotherapist
Kieran Hirpara 4.0
Side-lying external rotation
Lie on your non-operated side with the top elbow bent to a right angle and tucked against your body. Keeping the elbow at your side, rotate the forearm up towards the ceiling, then lower with control. No weight in this phase — weight is added later, as guided.
As guided by your physiotherapist
Kieran Hirpara 4.0
Wall finger-walk
Stand facing a wall and rest the fingers of the operated hand on it. Walk the fingers slowly up the wall, letting them take some of the arm's weight as the shoulder lifts, then walk back down. Keep the shoulder blade relaxed — no hitching towards your ear.
As guided by your physiotherapist
Kieran Hirpara 4.0
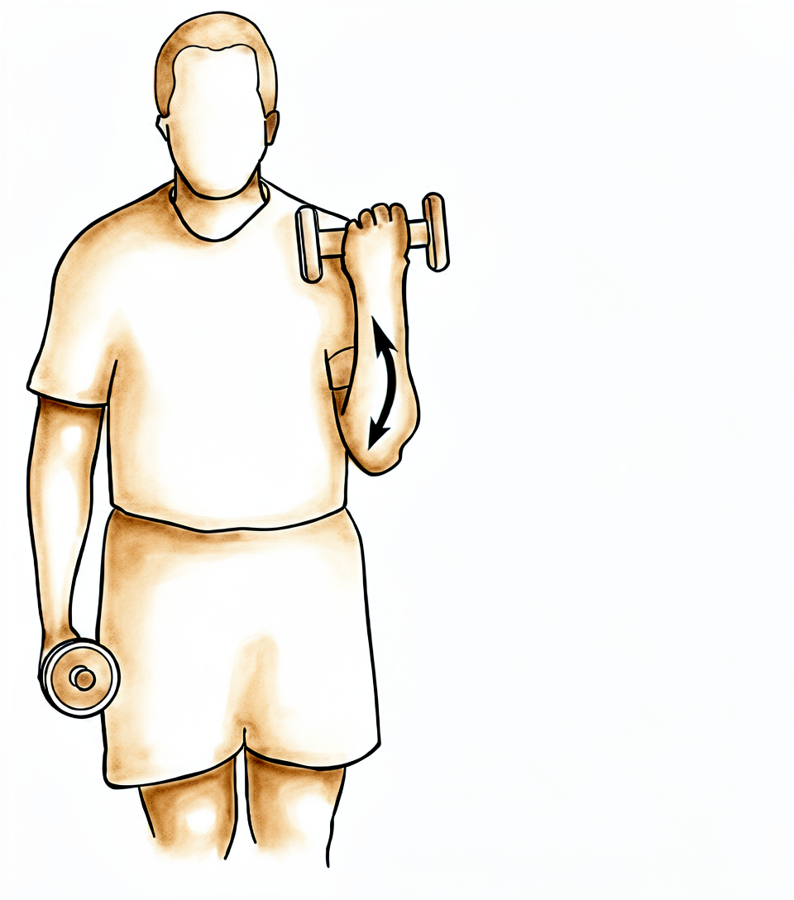
Biceps curl
With the upper arm by your side, bend the elbow to curl a light weight up towards your shoulder, then lower it slowly. Keep loads light in this phase — this rebuilds the arm without straining the repair.
As guided by your physiotherapist
Kieran Hirpara 4.0
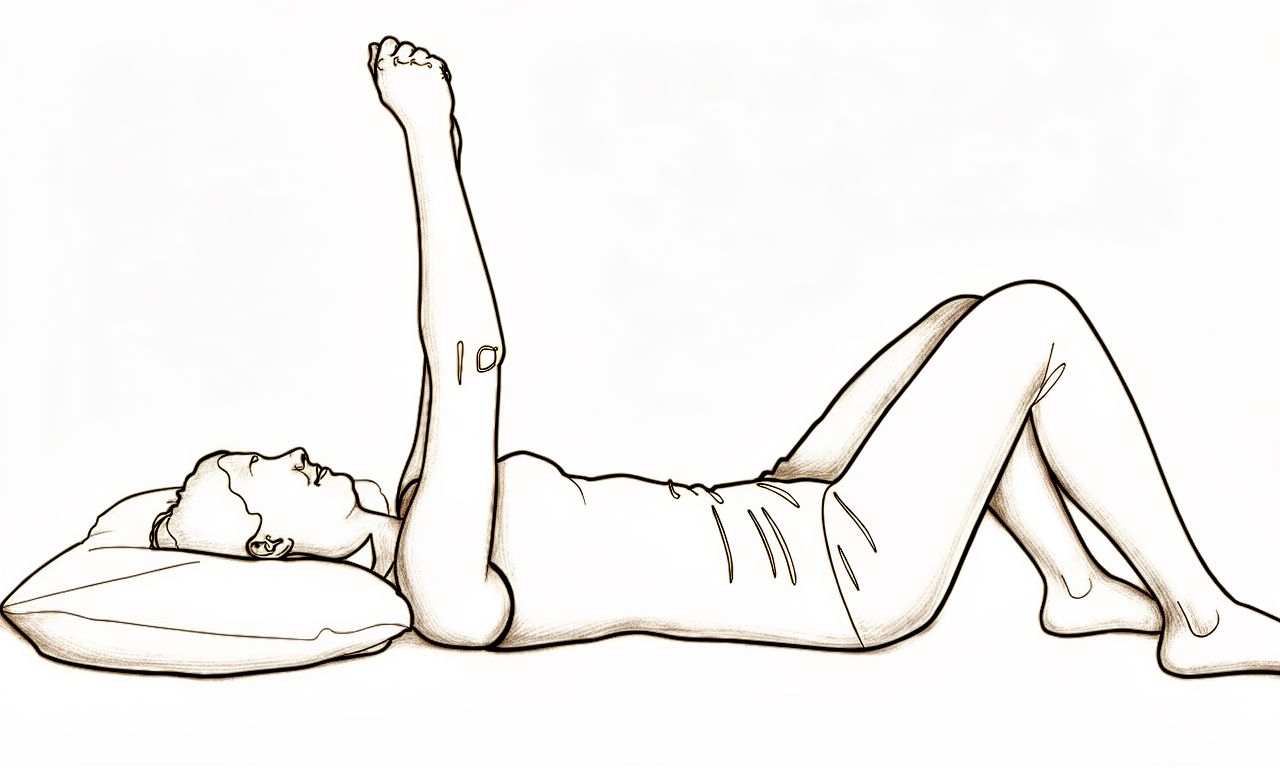
Serratus punch
Lie on your back with the operated arm pointing up towards the ceiling. Without bending the elbow, reach the fist a little further upwards so the shoulder blade lifts off the bed, then lower with control. This wakes up the muscle that holds the shoulder blade onto the ribs.
As guided by your physiotherapist
Kieran Hirpara 4.0
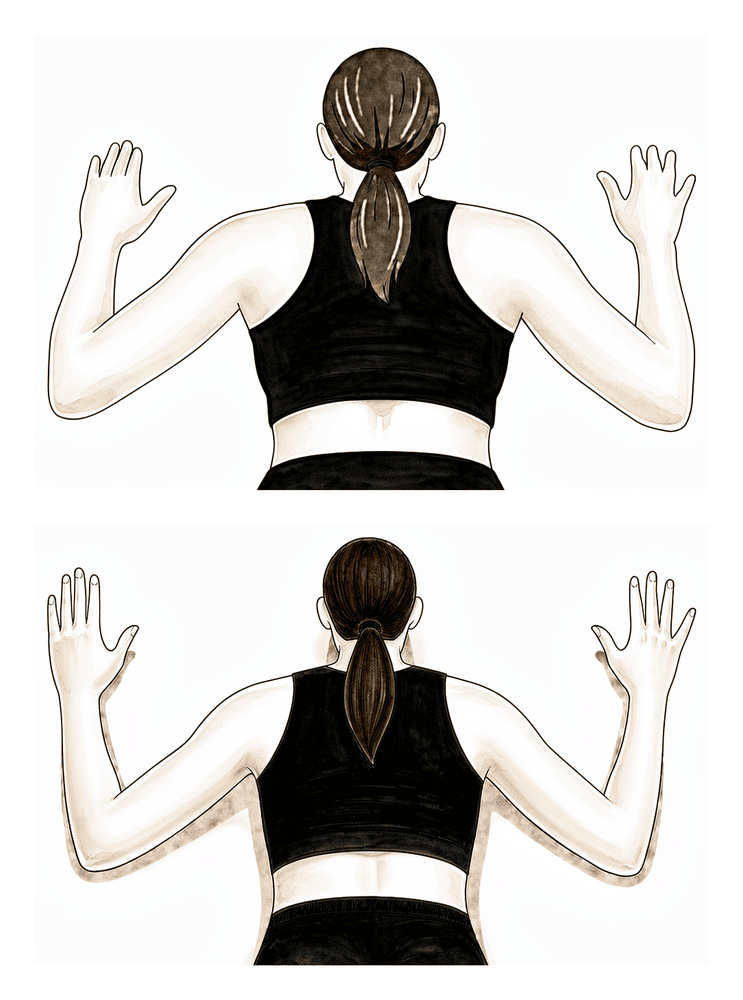
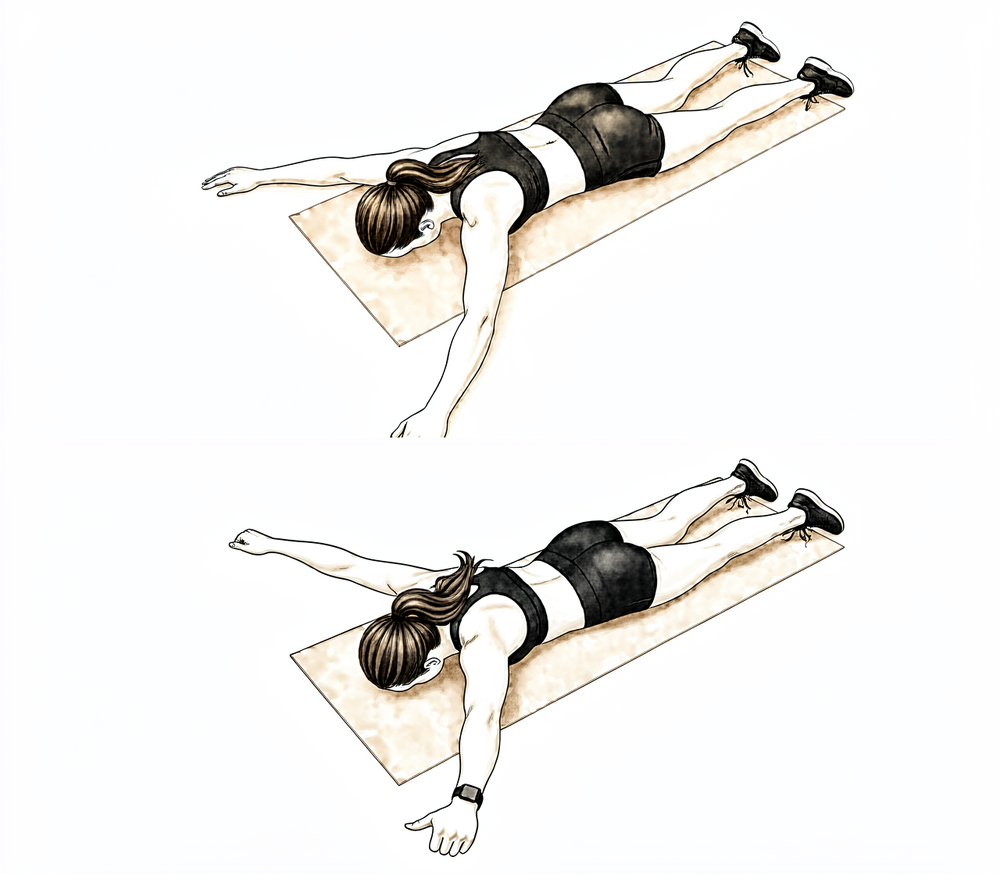
Prone T
Lie face down with the arms hanging towards the floor. Squeeze the shoulder blades together and raise the operated arm out to the side into a 'T', then lower slowly. Keep it light — this trains the shoulder-blade muscles without loading the joint heavily.
As guided by your physiotherapist

Kieran Hirpara 4.0
Standing scaption
Stand with the arm by your side, thumb pointing up. Raise the arm out at a forward angle, midway between straight ahead and out to the side, no higher than is comfortable, then lower slowly. Keep the shoulder blade settled and avoid shrugging.
As guided by your physiotherapist
Kieran Hirpara 4.0
Rhythmic stabilisation
With your arm supported in front of you at about shoulder height, have your physiotherapist (or your good hand) apply small, gentle pushes from different directions while you hold the arm still and steady — do not let it move. This trains the shoulder's stabilising muscles to react. Keep all the efforts gentle.
As guided by your physiotherapist
From about six weeks you wean out of the sling and the limits on movement are progressively lifted. Assisted movements become active ones, and range builds steadily — as a guide, published protocols progress range in roughly 15-degree steps each week, aiming for full movement by about week 12. Light elastic-band exercises for the rotator cuff and shoulder blade muscles begin during this phase. The repair still needs respect: keep lifting to about a kilogram, and avoid forceful pushing and pulling, push-ups, and lifting across the body or overhead. Reaching behind your back is usually the last movement to be freed up.
For your physiotherapist:
Goals
- Wean from the sling
- Progressively restore active range of motion in all planes (full, or near-full, by around week 12)
- Begin gentle strengthening; minimise muscle atrophy
- Re-establish scapulohumeral rhythm and neuromuscular control
Management
- Progress active-assisted to active elevation; wall slides and countertop slides into flexion
- Elevation in the scapular plane with attention to scapular mechanics — no hitching
- Behind-the-back internal rotation introduced gradually (to the beltline initially)
- Horizontal adduction as active reach only — no passive stretch yet
- Theraband internal and external rotation, biceps curl, row and serratus punch
- Dynamic scapular and cuff work: side-lying external rotation, prone row, prone extension, prone 'T's and 'Y's, standing scaption
- Proprioception and rhythmic-stabilisation drills
- Manual therapy and joint mobilisation as indicated
Precautions
- No lifting heavier than about a kilogram with the operated arm
- No forceful pushing or pulling; no push-ups
- No lifting of weighted objects overhead or across the body
- Avoid end-range stretching into cross-body adduction; behind-the-back movement progresses gradually
Criteria to progress
- At least around 140 degrees of passive flexion and 60 degrees of passive external rotation in the scapular plane
- Active flexion against gravity to at least around 100 degrees with good mechanics
- Tolerating the active range-of-motion and early strengthening program
Phase III — Strengthening (Weeks 12–18)
Kieran Hirpara 4.0
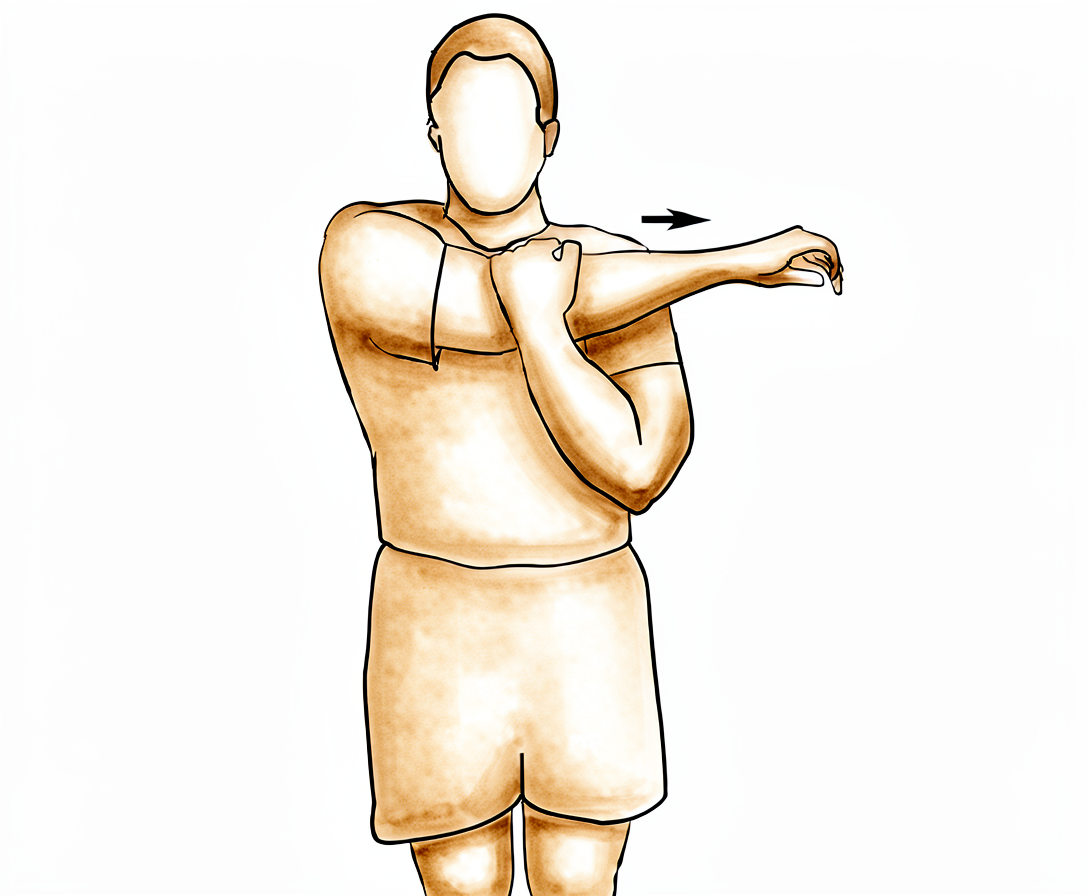
Cross-body stretch
Bring the operated arm across your chest and use the other hand, placed above the elbow, to draw it gently further across until you feel a stretch at the back of the shoulder. Hold, then release. This stretch was off-limits earlier and is now used to win the final degrees of range.
As guided by your physiotherapist
Kieran Hirpara 4.0
Sleeper stretch
Lie on the operated side with the shoulder and elbow each bent to a right angle. Use the other hand to ease the forearm gently down towards the bed until a stretch is felt at the back of the shoulder. Hold, then relax — a stretch, not pain.
As guided by your physiotherapist
Kieran Hirpara 4.0
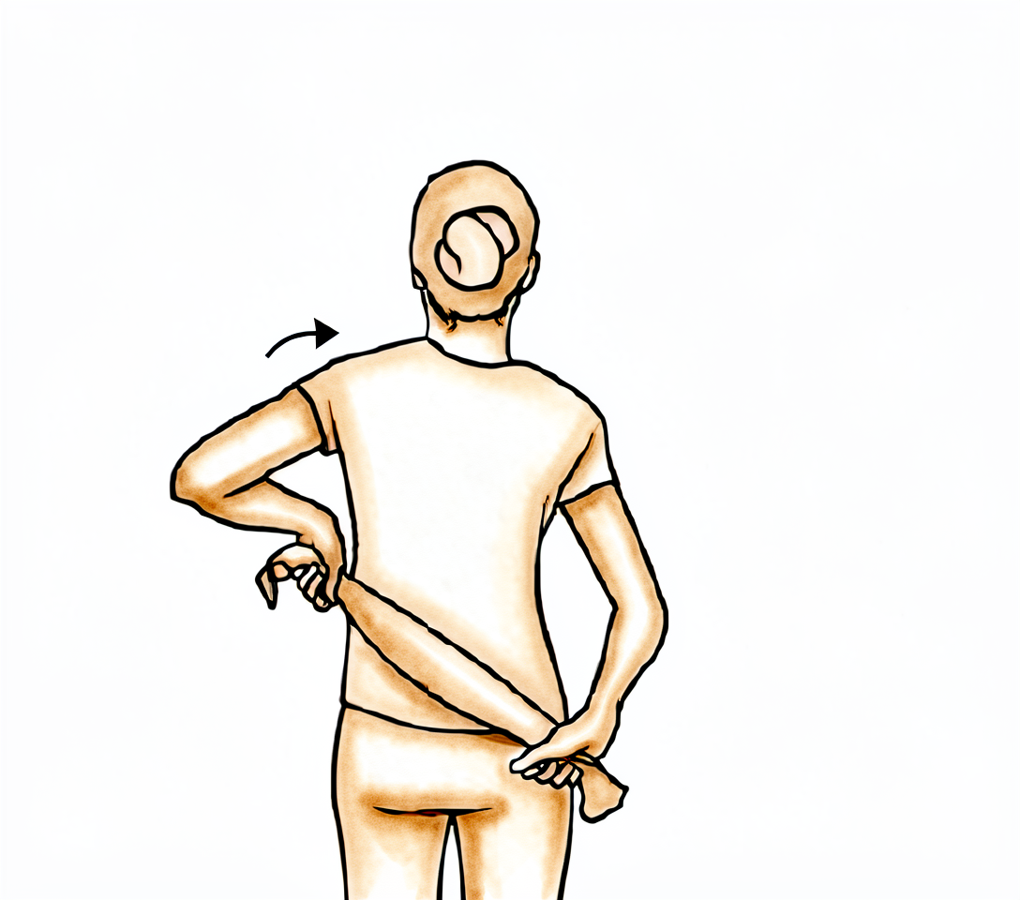
Behind-the-back stretch with a towel
Hold a towel behind your back, the good hand over the shoulder and the operated hand at the small of the back. Gently draw the towel upwards with the good hand to ease the operated hand up the back until a stretch is felt, then release. Behind-the-back movement is one of the last to return, so progress it gently.
As guided by your physiotherapist

Kieran Hirpara 4.0
Hands behind head
Clasp both hands behind your head and gently ease the elbows outwards and back until a stretch is felt at the front of the shoulder. Hold, then relax. This wins back the last of the outward-rotation range with the arm raised.
As guided by your physiotherapist
Kieran Hirpara 4.0
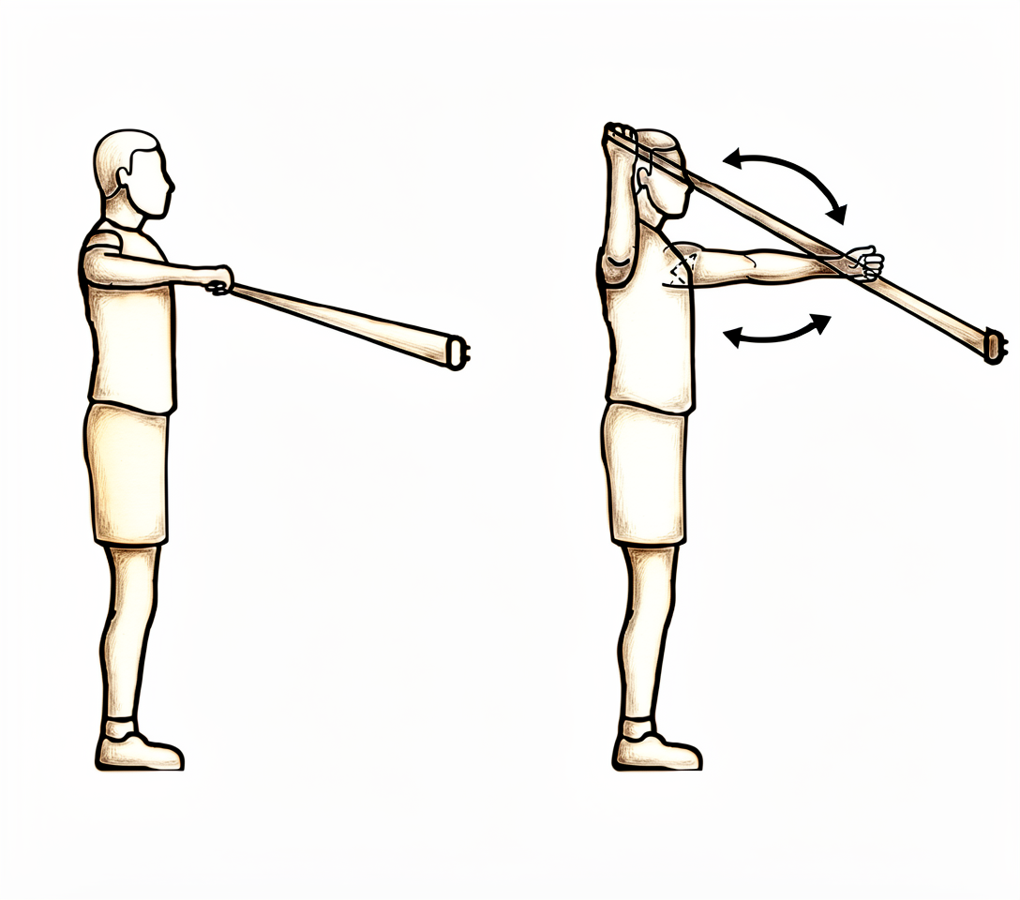
External rotation at 90 degrees
Raise the arm out to shoulder height with the elbow bent to a right angle, holding an elastic band. Rotate the forearm upwards against the band so the back of the hand travels up, then return slowly. A higher-level rotator cuff exercise once movement and control are good.
As guided by your physiotherapist
Kieran Hirpara 4.0
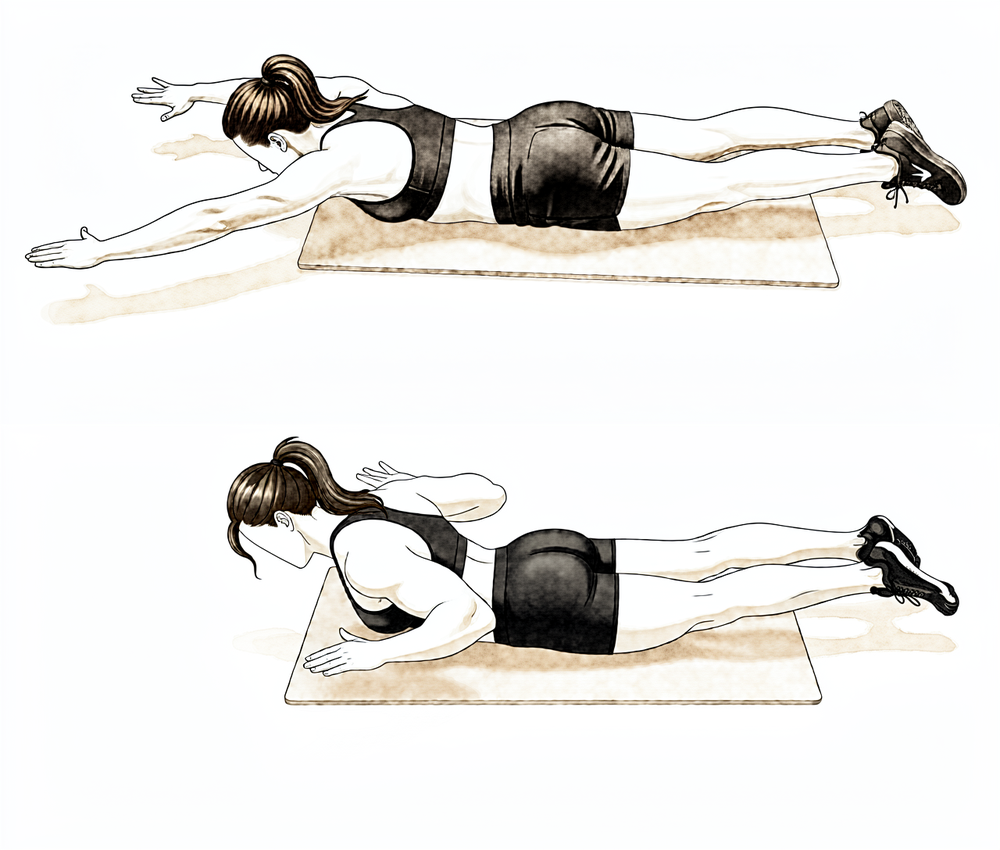
Prone W
Lie face down with the arms hanging. Squeeze the shoulder blades together and draw the elbows back and down so the arms make a 'W', then lower slowly. Builds the lower shoulder-blade muscles that steady the joint.
As guided by your physiotherapist

Kieran Hirpara 4.0
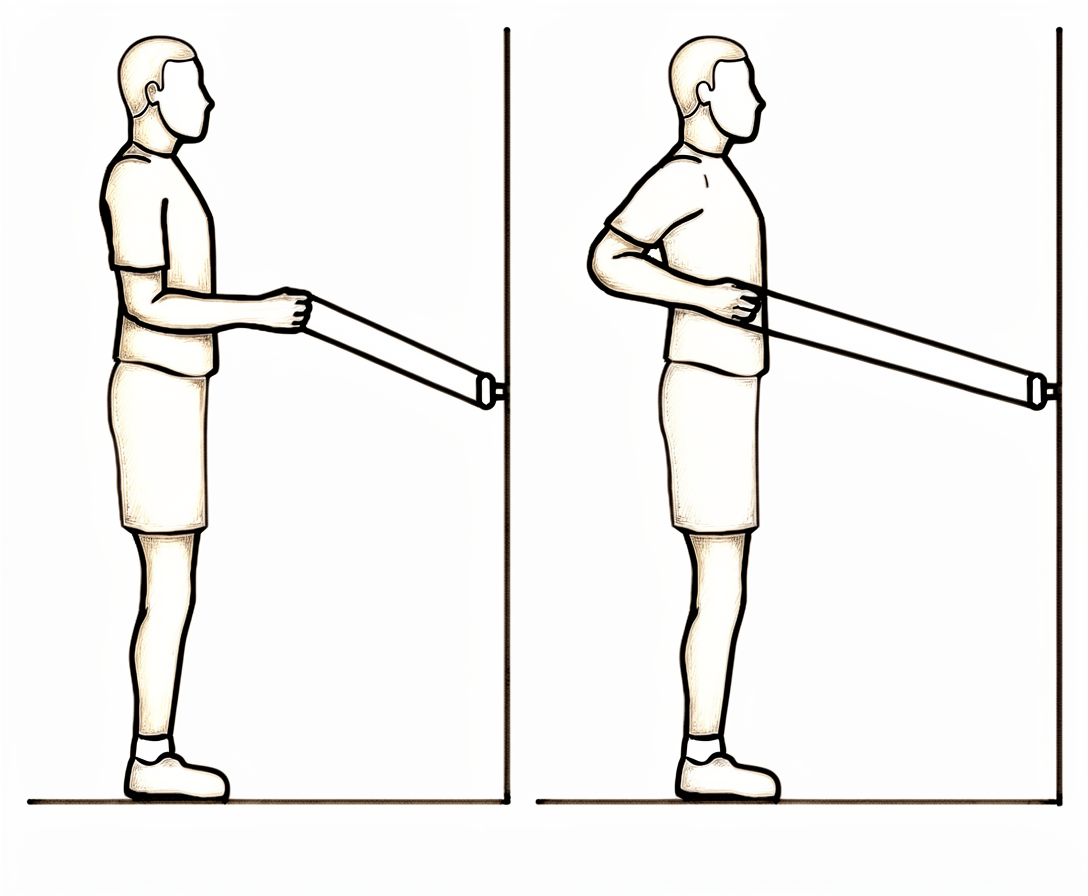
Diagonal band pattern (D1)
Hold an elastic band and draw it on a diagonal, from across the front of your body up and out to the opposite side, then return slowly. These diagonal patterns train the shoulder the way it works in everyday reaching.
As guided by your physiotherapist
Kieran Hirpara 4.0
Diagonal band pattern (D2)
Hold an elastic band low and across your body, then draw it up and out overhead to the side on a diagonal, finishing with the thumb up, and return slowly. A second diagonal pattern that builds control through a wider range.
As guided by your physiotherapist
Kieran Hirpara 4.0
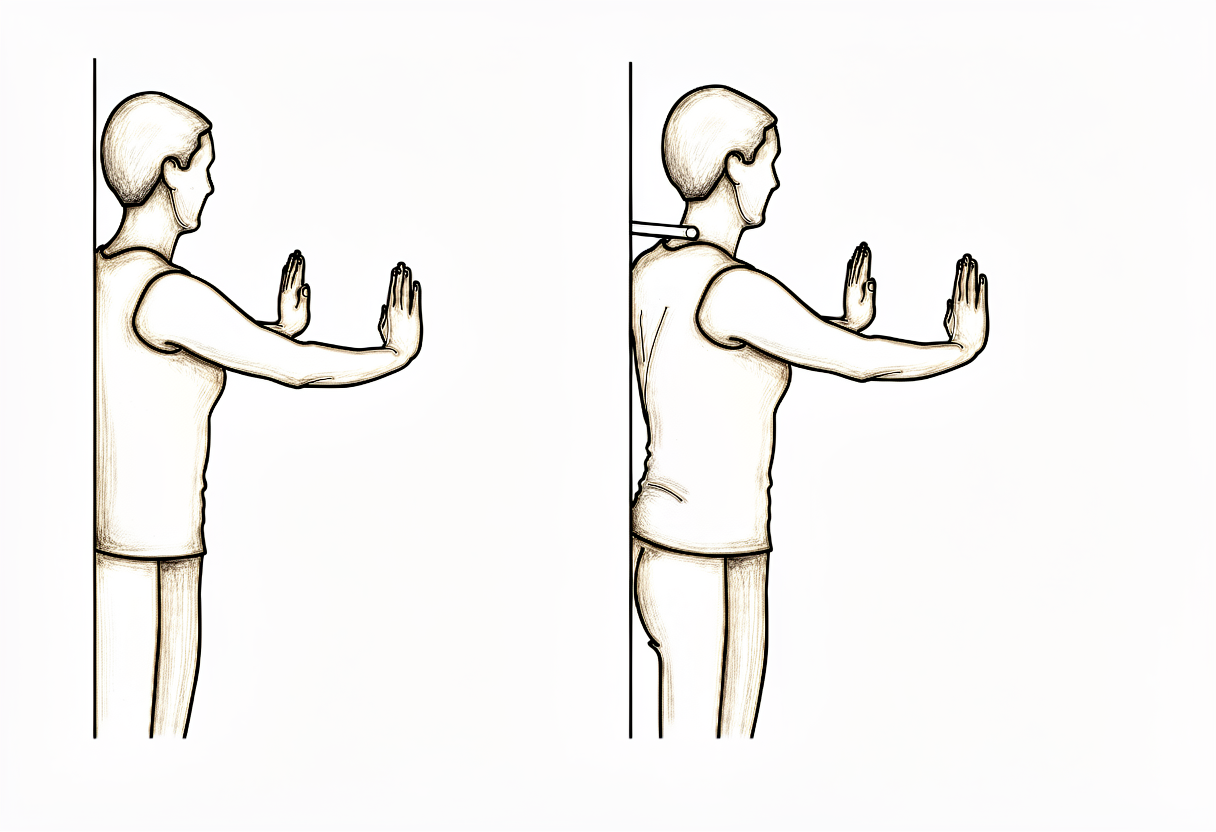
Wall push-up
Stand facing a wall with your hands on it at shoulder height. Bend the elbows to bring your chest towards the wall, then push back; at the top, push a little further so your upper back rounds away from the wall. Start at the wall before progressing — keep the shoulder blades controlled.
As guided by your physiotherapist

Kieran Hirpara 4.0
External rotation at 90/90 (band)
With the arm out to the side at shoulder height and the elbow bent to a right angle, rotate the forearm back and up against a light band or weight, then lower slowly. Builds rotator-cuff strength in the raised (throwing) position.
2 to 3 sets of 10 to 15, low resistance
Kieran Hirpara 4.0
Internal rotation at 90/90 (band)
From the same position with the arm out to the side at shoulder height, rotate the forearm forwards and down towards your feet against a light band or weight, then return with control.
2 to 3 sets of 10 to 15, low resistance
Kieran Hirpara 4.0
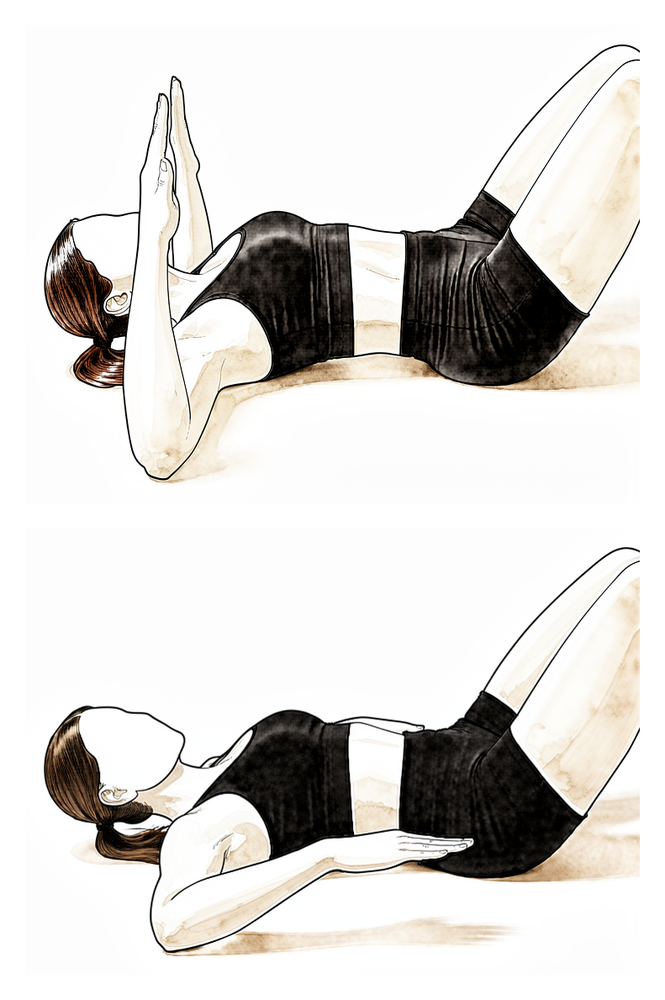
Prone Y (lower shoulder blade)
Lie face down with your operated arm reaching overhead and out at about 45° to form a Y, thumb pointing up. Lift the arm a small way off the surface by drawing the shoulder blade down and back, then lower slowly. Keep it light — this targets the lower shoulder-blade muscles.
As guided by your physiotherapist — light, high repetitions
Kieran Hirpara 4.0
Prone row
Lie face down with the operated arm hanging down towards the floor. Draw your elbow up towards the ceiling, squeezing the shoulder blade in towards your spine, then lower slowly. Start with no weight and keep the movement controlled.
As guided by your physiotherapist
With the repair matured and movement largely restored, attention turns to rebuilding strength. The stretches that were off-limits earlier — across the body and up behind the back — are now used to win the final degrees of range. Resistance work progresses from elastic bands to light weights, and push-ups begin against a wall before progressing. Gym-based weight training is typically reintroduced from about week 16, with limited range and light loads at first. Heavy overhead lifting and forceful pushing and pulling are still avoided in this phase.
For your physiotherapist:
Goals
- Full active and passive range of motion in all planes
- Progressive strength, endurance and neuromuscular control of the cuff and scapular stabilisers
- Prepare for a graduated return to sport-specific loading
Management
- Multi-directional end-range stretching: cross-body stretch, behind-the-back internal rotation, hands-behind-head, sleeper stretch, external rotation at 90 degrees of abduction
- Progressive resistance (roughly 0.5–2.5 kg) added to the dynamic program: side-lying external rotation, prone row, prone extension, prone 'T's and 'Y's, standing scaption
- Theraband progressions: 'T's, 'W's, diagonals, internal and external rotation at 90 degrees
- Closed-chain work: wall push-ups from around week 12, progressing per tolerance
- Machine-based weight training from around week 16 — limited range, light load (rows, pull-downs, biceps and triceps; pressing reintroduced cautiously)
- Rhythmic stabilisation, proprioception and scapulohumeral-rhythm drills
Precautions
- Avoid heavy lifting, particularly overhead, and forceful pushing and pulling
- Strengthening stays pain-free and stops short of provocative end-range loading
- Maintain scapular control through range — regress the load if hitching or compensation appears
Criteria to progress
- Active and passive shoulder motion within functional limits in all directions
- Tolerating the progressive strengthening program without flare-up
Phase IV — Return to sport and heavy work (Week 18 onwards)
The final phase is a graduated return to strenuous work, overhead loading and sport. Plyometric and sport-specific drills are layered onto the strengthening program, and interval programs guide the return to throwing, swimming, golf and racquet sports. Return to contact and collision sport typically takes around four to six months from surgery — it depends on regaining full movement, strength and confidence in the arm, and published programs for collision athletes sometimes run longer, up to around nine months. Strength athletes typically rebuild towards their usual training over a similar timeframe. Your physiotherapist and surgeon will guide the final clearance, and some collision athletes choose to wear a shoulder brace for the first season back.
For your physiotherapist:
Goals
- Maintain full range of motion
- Progress strength, power and endurance to the demands of the patient's work and sport
- Graduated, criteria-based return to contact and overhead sport
Management
- Continue and progress the Phase III strengthening program
- Closed-chain progressions: push-up progression to unstable surfaces, ball-on-wall work
- Plyometrics for throwing and overhead athletes: rebounder throws, weighted-ball work, wall dribbles, deceleration drills
- Interval sport programs for throwing, golf, tennis and swimming
- Function- and occupation-specific kinetic-chain strength and endurance
Precautions
- Return to contact and collision sport only with full range, restored strength and surgical clearance
- Progression remains symptom-guided — if pain or a sense of instability appears, step back a stage
After your protocol
The phases above are drawn from published rehabilitation protocols for AC joint stabilisation and reconstruction — Massachusetts General Brigham Sports Medicine, the Massachusetts General Hospital sports medicine AC joint reconstruction program, the ACJ stabilisation guidelines of UK shoulder units, and a systematic review of publicly available AC joint reconstruction protocols. The week ranges are typical rather than fixed, and published programs vary — your ongoing rehabilitation is guided individually by your physiotherapist, working with the practice, based on how your repair and movement recover. This page works alongside the practice's general recovery advice — see managing post-operative pain and wound care. For the operation itself and the injury it treats, see AC joint stabilisation. The evidence behind this protocol — the reconstruction, the loss-of-reduction literature, and the rehabilitation studies — is summarised in the evidence section, available as a PDF from the top of this page.
Evidence & references
Acromioclavicular Joint Stabilisation / Reconstruction — Operative Rationale & Post-operative Rehabilitation (Evidence)
Topic scope: Post-operative rehabilitation after acromioclavicular (AC) joint stabilisation / reconstruction for a high-grade AC joint dislocation (Rockwood type III–V) — restoring the alignment between the clavicle and scapula with a coracoclavicular (CC) suspensory device (suture-button / endobutton construct), with or without a biological tendon graft (semitendinosus / pectoralis minor) and with or without a direct AC ligament reconstruction. This page also summarises the operative/non-operative evidence that frames the rehabilitation choices. It is the clinician-facing companion to the patient protocol.
Defining principle of the surgical rehab here — PROTECT the construct. Unlike a capsular release (where the enemy is re-stiffening and rehab is immediate aggressive ROM), AC joint stabilisation is a protect-the-repair pathway, closer in spirit to a rotator-cuff or instability repair. The reconstruction has to resist the constant downward pull of gravity on the weight of the arm — the exact deforming force that displaced the joint in the first place. A suspensory suture-button or tendon graft has no early intrinsic strength; biological healing of the CC/AC ligaments and tunnel incorporation takes weeks to months, and the dominant early complication is loss of reduction before that healing matures. So the rehab is deliberately conservative: the sling carries the weight of the arm (typically ~6 weeks), active elevation and any downward traction on the arm are avoided early, ROM is restricted (no elevation > 90°, no cross-body, no reaching behind the back) for the first 6 weeks, strengthening waits until the construct has matured (~12 weeks), and return to contact/collision sport is deferred to ~4–6 months. Motion progression and protection are the two levers; the single most important point distinguishing this protocol from the capsular-release inversion is that here, time and protection are the friends, not the enemy.
A. THE OPERATION & WHY REHAB IS PROTECTIVE
A high-grade AC dislocation tears the AC and coracoclavicular (conoid + trapezoid) ligaments, allowing the clavicle to rise relative to the acromion under the weight of the arm. Surgical stabilisation aims to restore the CC distance and let the ligaments heal in a reduced position. Contemporary constructs are predominantly:
- CC suspensory fixation — a suture-button / endobutton loop passed through clavicular and coracoid tunnels (e.g. flip-button, single- or double-tunnel). Restores vertical stability.
- + Biological augmentation — a free tendon graft (semitendinosus allograft/autograft, or the pectoralis minor / coracoacromial ligament in Weaver–Dunn-type procedures) to reconstruct the CC ± AC ligaments. The anatomy of the pectoralis minor tendon has been characterised specifically for this use [pec minor anatomy, JSES 2007].
- + Direct AC reconstruction — adding an AC-level construct to the CC reconstruction improves horizontal stability; combined CC + AC reconstruction gives better radiographic reduction and lower reoperation rates than isolated CC reconstruction in pooled data.
The structural properties of the reconstructed CC complex have been measured biomechanically: reconstructions restore much, but not all, of the intact ligament's stiffness and load to failure [Structural Properties, Am J Sports Med 2000]. This is the mechanical basis for protecting the construct early — the graft/button is weaker than the native ligament until it heals and incorporates.
B. EVIDENCE BY THEME
1. Operative vs non-operative — only high grades benefit from surgery
- Type I–II AC injuries are managed non-operatively. Type III is genuinely controversial and most are treated non-operatively first; type IV–V are the usual operative indications [ACJ Injuries: Evidence-based Treatment, JAAOS 2018]. A network meta-analysis of RCTs for acute Rockwood III–V found no single surgical technique clearly superior, and that surgery's advantage over non-operative care is modest and grade-dependent [network MA, JSES 2023].
- Hook-plate fixation of acute dislocations improved radiographic but NOT clinical outcomes versus non-operative treatment [Hook-plate RCT, JBJS 2017] — a caution that radiographic reduction does not automatically translate into a better patient outcome, and a reason the hook plate (which requires removal) is not the preferred construct here.
- The Rockwood classification itself has only moderate reliability between observers [Rockwood reliability, JSES 2021], which is part of why type III decision-making is debated.
2. Loss of reduction is the dominant complication — and it shapes the rehab
- Loss of reduction (the clavicle drifting back up) is the most frequent radiographic failure after suspensory-device stabilisation. Clavicular tunnel widening correlates with post-operative loss of reduction in an implant-dependent way [tunnel widening, Arthroscopy 2023] — i.e. the construct and tunnel position matter.
- Radiographic failure and reoperation rates after ACJ reconstruction are non-trivial [radiographic failure / reoperation, Bone Joint J 2016]; one suspensory-device series reported ~10–11% revision for loss of reduction / implant failure (suture fatigue, button escape, coracoid stress fracture, deep infection) [web: suspensory-device cohort].
- Adding the AC-level reconstruction and a biological graft improves radiographic reduction and lowers reoperation versus isolated CC suture-button [web: combined CC+AC reviews].
- Complications after operative treatment of high-grade injuries are well catalogued [complications, JSES 2023] — they include loss of reduction, coracoid/clavicle fracture, hardware problems and infection.
Rehab implication: because the early failure mode is mechanical loss of reduction under arm-weight loading, the early phase forbids active elevation, lifting, downward traction on the arm and weight-bearing through the arm — the patient protects the construct while the ligaments and tunnels heal.
3. Outcomes and return to sport are generally good — but timeline is conservative
- Anatomic CC reconstruction with semitendinosus graft for chronic dislocation gives good clinical and radiological results [semitendinosus reconstruction, KSSTA 2020].
- Sports activity after anatomic flip-button stabilisation is generally restored, with most athletes returning to their pre-injury sport, though return is gradual [flip-button sport, KSSTA 2016].
- Delayed (chronic) reconstruction with a modern suspensory device does not increase fixation failure or major complications versus acute fixation [web: delayed reconstruction].
4. The rehab protocol itself is consensus/expert, not RCT-derived — and it is highly variable
A systematic review of publicly available ACJ-reconstruction rehabilitation protocols found they are widely variable: sling duration ranged 3–8 weeks (the modal recommendation was 6 weeks, in 8/18 protocols), active ROM commonly began at ~6 weeks (6/20 protocols), and heavy/strenuous shoulder use was typically prohibited for a further ~6 weeks beyond the initial 6-week protection period [Cheema et al., Arthrosc Sports Med Rehabil 2021]. There is no high-level RCT defining the optimal post-op regimen — phase timings are expert/consensus.
The patient protocol's phase boundaries (0–6 / 6–12 / 12–18 weeks, sling 6 weeks, return to contact sport ~4–6 months) sit squarely within this published range and match the Massachusetts General Brigham / MGH Sports Medicine ACJ-reconstruction guideline (Phase I 0–6 wk, Phase II 7–12 wk, Phase III 13–18 wk) and similar surgeon protocols (e.g. Dickens: 6-week sling, return to all activity months 4–6).
C. PHASED POST-OP TIMELINE (consistent with the patient protocol)
| Phase | Window | Sling | ROM | Strengthening | Notes |
|---|---|---|---|---|---|
| I — Protecting the repair | Weeks 0–6 | Yes, ~6 wk whenever up; worn for sleep weeks 0–3 (arm-weight loads the repair even lying down) | Pendulum + passive/assisted elevation to 90° max in scapular plane; assisted ER to ~30°; NO active elevation, no cross-body, no behind-the-back | Hand/wrist/elbow AROM; scapular setting; sub-maximal pain-free isometric IR/ER only | No driving while in the sling (~6 wk). No lifting > ~0.5 kg, no carrying, no leaning/pushing up on the arm, no letting the arm hang unsupported — each loads the construct |
| II — Restoring movement | Weeks 6–12 | Wean off | Progress assisted → active ROM; build toward full by ~12 wk (~15°/week as a guide); behind-the-back introduced gradually (to beltline) | Light elastic-band cuff + scapular work begins (rows, IR/ER, serratus punch); side-lying ER, prone row/T/Y | Lift to ~1 kg; avoid forceful push/pull, push-ups, overhead and cross-body lifting |
| III — Strengthening | Weeks 12–18 | Off | Full ROM goal; end-range stretches (cross-body, behind-back, sleeper) now used to win final range | Progressive resistance ~0.5–2.5 kg; wall push-ups from ~wk 12; machine weights from ~wk 16 (limited range, light load) | Construct matured; still avoid heavy overhead and forceful push/pull |
| IV — Return to sport / heavy work | Week 18 onward | Off | Maintain full ROM | Plyometrics, sport-specific & interval programs; occupation-specific kinetic-chain loading | Return to contact/collision sport ~4–6 months (collision athletes / some occupations longer, up to ~9 mo); criteria-based clearance; some wear a brace first season back |
(Phase boundaries from the MGH/Mass General Brigham ACJ-reconstruction guideline; return-to-sport windows from the flip-button sport series and surgeon protocols; all within the variability documented by Cheema et al. 2021.)
D. KEY CONTROVERSIES / EVIDENCE QUALITY
- Type III — operate or not? The most-debated grade; most are trialled non-operatively first. No clear winner in RCT-level data, compounded by only-moderate reliability of the Rockwood grade itself. Moderate / conflicting.
- Which construct? Network MA shows no single technique clearly superior for acute III–V. Combined CC + AC reconstruction (± graft) gives better radiographic reduction and lower reoperation than isolated CC suture-button, but at the cost of complexity. Hook plates improve radiographs but not clinical scores and need removal. Moderate.
- Loss of reduction vs clinical outcome. Radiographic loss of reduction is common yet often clinically well-tolerated — radiographic and patient-reported outcomes diverge. This tempers how aggressively reduction should be chased. Moderate.
- The rehab protocol is consensus, not trial-derived, and published protocols vary widely (sling 3–8 wk; Cheema 2021). The patient page's timings are typical, not RCT-validated. Weak / consensus.
E. EVIDENCE-STRENGTH FLAGS (summary)
- STRONG (RCT / SR-MA): hook-plate improves radiographic but not clinical outcomes vs non-operative (RCT, JBJS 2017); network meta-analysis of RCTs for acute III–V shows no clearly superior technique (JSES 2023).
- MODERATE (cohorts / biomechanical / SR): anatomic semitendinosus CC reconstruction outcomes (KSSTA 2020); sports return after flip-button stabilisation (KSSTA 2016); loss-of-reduction / tunnel-widening drivers (Arthroscopy 2023; Bone Joint J 2016); complications of high-grade operative treatment (JSES 2023); reconstructed-CC biomechanics (AJSM 2000); combined CC+AC > isolated CC for reduction/reoperation; delayed reconstruction safety.
- WEAK / CONSENSUS ONLY: the post-operative rehabilitation protocol itself — no defining RCT; protocols are expert/consensus and highly variable (Cheema 2021; sling 3–8 wk). Rockwood classification reliability only moderate (JSES 2021).
CITATIONS
RAG corpus (180,000+ Orthopaedic articles)
- Anatomy of the pectoralis minor tendon and its use in acromioclavicular joint reconstruction. J Shoulder Elbow Surg. 2007. DOI: 10.1016/j.jse.2006.09.007
- Clavicular tunnel widening after acromioclavicular stabilization shows implant-dependent correlation with postoperative loss of reduction. Arthroscopy. 2023. DOI: 10.1016/j.arthro.2023.05.014
- Acromioclavicular joint injuries: evidence-based treatment. J Am Acad Orthop Surg. 2018. DOI: 10.5435/jaaos-d-17-00105
- Review of Weaver and Dunn on treatment of acromioclavicular injuries, especially complete acromioclavicular separation. J ISAKOS. 2019. DOI: 10.1136/jisakos-2019-000299
- Structural properties of the intact and the reconstructed coracoclavicular ligament complex. Am J Sports Med. 2000. DOI: 10.1177/03635465000280010201
- Complications after operative treatment of high-grade acromioclavicular injuries. J Shoulder Elbow Surg. 2023. DOI: 10.1016/j.jse.2023.03.019
- Sports activity after anatomic acromioclavicular joint stabilisation with flip-button technique. Knee Surg Sports Traumatol Arthrosc. 2016. DOI: 10.1007/s00167-016-4287-7
- Anatomic reconstruction of the coracoclavicular and acromioclavicular ligaments with semitendinosus tendon graft for the treatment of chronic acromioclavicular joint dislocation provides good clinical and radiological results. Knee Surg Sports Traumatol Arthrosc. 2020. DOI: 10.1007/s00167-020-06285-x
- Hook-plate fixation in patients with acute acromioclavicular joint dislocation improved radiographic but not clinical outcomes compared with nonoperative treatment. J Bone Joint Surg Am. 2017. DOI: 10.2106/jbjs.16.00582
- Radiographic failure and rates of re-operation after acromioclavicular joint reconstruction. Bone Joint J. 2016. DOI: 10.1302/0301-620x.98b4.35935
- Treatment options for acute Rockwood type III–V acromioclavicular dislocations: a network meta-analysis of randomized controlled trials. J Shoulder Elbow Surg. 2023. DOI: 10.1016/j.jse.2023.01.039
- A relook at the reliability of Rockwood classification for acromioclavicular joint injuries. J Shoulder Elbow Surg. 2021. DOI: 10.1016/j.jse.2021.01.016
Literature (URLs)
- Cheema SG, Hermanns C, Coda RG, et al. Publicly accessible rehabilitation protocols for acromioclavicular joint reconstruction are widely variable. Arthrosc Sports Med Rehabil. 2021;3(2):e427–e433. https://doi.org/10.1016/j.asmr.2020.10.007 (sling 3–8 wk, modal 6 wk; active ROM ~6 wk; further ~6 wk before heavy use)
- Acromioclavicular joint injuries: effective rehabilitation (review). PMC. https://pmc.ncbi.nlm.nih.gov/articles/PMC8169819/
- Delayed acromioclavicular joint reconstruction using a modern tunnelled suspensory device does not increase the risk of fixation failure or major complications. PubMed. https://pubmed.ncbi.nlm.nih.gov/35781084/
- Low rate of substantial loss of reduction immediately after hardware removal following ACJ stabilization using a suspensory fixation system. KSSTA. https://link.springer.com/article/10.1007/s00167-022-06978-5
- Minimum 10-year outcomes after arthroscopically assisted anatomic coracoclavicular ligament reconstruction for type III and V AC joint injuries. ScienceDirect. https://www.sciencedirect.com/science/article/pii/S2666638325001835
Published rehab protocols (URLs — basis for the phase structure)
- Massachusetts General Brigham Sports Medicine. Rehabilitation guideline for acromioclavicular joint reconstruction (including coracoclavicular ligament reconstruction). https://www.massgeneral.org/assets/MGH/pdf/orthopaedics/sports-medicine/physical-therapy/rehabilitation-protocol-for-acromioclavicular-joint-reconstruction.pdf (Phase I 0–6 wk sling, Phase II 7–12 wk, Phase III 13–18 wk)
- Dickens JD. AC joint reconstruction protocol (Duke Sports Medicine). https://www.jondickensmd.com/pdf/ac-joint-reconstruction-protocol.pdf (6-week sling worn for sleep; return to all activity months 4–6)
- Chambler A. ACJ stabilisation rehabilitation guidelines. https://www.andrewchambler.com/post/acj-stabilisation-rehabilitation-guidelines
- North Tees and Hartlepool NHS Foundation Trust. Acromioclavicular joint stabilisation — LockDown/Weaver Dunn procedure. https://www.nth.nhs.uk/resources/acromioclavicular-joint-stabilisation-lockdown-weaver-dunn-procedure/
- Stone Clinic. Acromioclavicular (AC) joint reconstruction rehab protocol. https://www.stoneclinic.com/Acromioclavicular-AC-joint-reconstruction-rehab-protocol